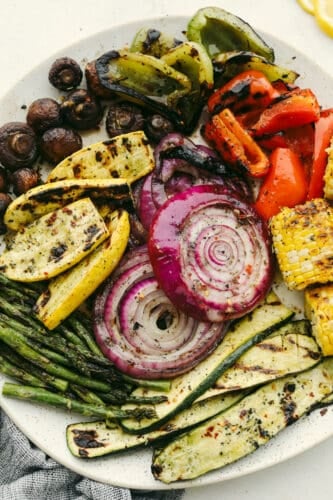
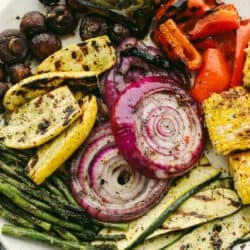
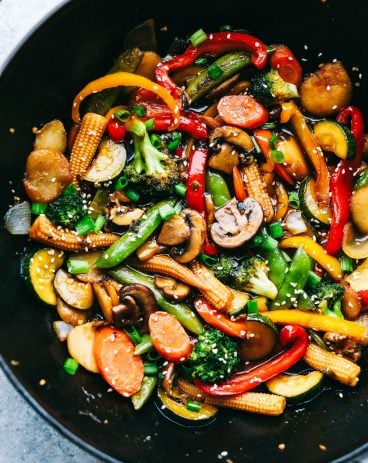
These delicious grilled vegetables are the perfect side to enhance any meal. They are drizzled with a savory garlic marinade that amplifies each vegetable’s amazing flavor and texture!
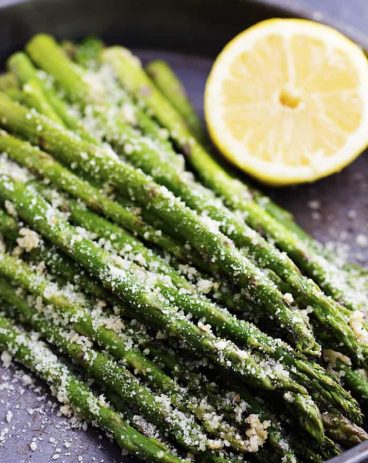
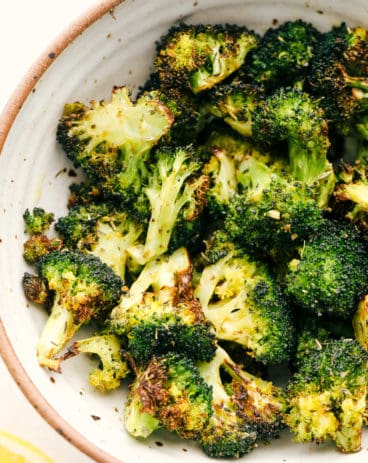
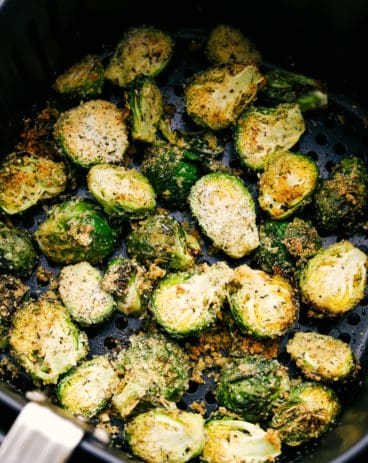
I love healthy ways to add a burst of flavor to vegetables. I know you will love my asparagus, broccoli, and brussels sprouts for other veggie side dishes that will taste just as good as your entrée!
Easy Grilled Vegetables Recipe
You can never go wrong with a juicy cut of meat served with a side of grilled vegetables at a barbecue. And why pick just one veggie when you can have a variety of all the best summer vegetables? With zucchini, mushrooms, asparagus, yellow squash, corn, and red onion, you have a decadent selection of veggies that not only look good, are good for you, but taste good too!! The juicy, savory marinade truly brings out the best in each of these vegetables. Once they are grilled to a perfect char, you are left with a tender, smoky result with just a hint of sweetness.
The best part about this recipe, though, is that it is SUPER simple to put together but tastes INCREDIBLE! With just a touch of olive oil, fresh garlic, and herbs, you are left with a delicious side that not even the fanciest of steakhouses can rival. Don’t take my word for it! I know this will be a winning side dish that will keep your guests coming back for more.
Best Grilled Vegetables Ingredients
With just a few ingredients, these grilled vegetables come together easily for the perfect summer side. For all the ingredients and measurements see the recipe card below.
Zucchini: Sliced into thin strips.
Mushrooms: I like using small, brown mushrooms for adding different size and texture to the vegetable variety.
Asparagus: One stalk.
Squash: Yellow, sliced into thin strips.
Corn: On the cob, cut into thirds.
Red Onion: Sliced ½ inch thick.
Vegetable Marinade
Olive Oil: Pulls flavors together and helps the vegetables cook perfectly.
Garlic Clove: Fresh, sliced.
Salt and Pepper: To taste.
Crushed Red Pepper: Adds a hint of spice to your marinade.
Lemon: I like to use the juice of half of a lemon.
How to Make Grilled Vegetables
This recipe is ideal for having a complete meal in just a few minutes. Have a tasty dinner bursting with flavor even on busy weeknights!
Add Vegetables: Add bell pepper, zucchini, mushrooms, asparagus, squash, corn and red onion to a large bowl.
Mix Marinade Ingredients: In a small bowl add the olive oil, garlic, pepper, salt, crushed red pepper and lemon juice.
Pour Over Vegetables: Pour on top of the veggies and toss.
Prep Grill: Preheat the grill to medium high heat. Add the veggies to the grill. You can also use a basket for the grill.
Grill Vegetables: Cook the mushrooms, asparagus, for about 3-4 minutes and the rest of the veggies for 5-7 minutes until they start to soften and have a nice char.
Grilled Vegetables Quick Tips
Elevate your grilled vegetables with just a few easy tips and tricks.
Thickness of Slices: It is best to keep your vegetables in slices that are relatively the same thickness. This will make sure that they all cook evenly and some do not cook faster than others.
Vegetables Too Dry: Let your vegetables marinate for at least an hour to prevent them from becoming dry when grilled. This gives oil-based marinades time to really sink into the vegetables.
Sweetness: Grilling vegetables brings out their natural sugars, so if you don’t want them to be too sweet, you can use extra marinade or seasoning to counteract this.
Grill or Stovetop:These grilled vegetables can be cooked on a gas or charcoal grill as well as in a skillet on the stove for a delicious year-round meal.
Other Vegetables: Add more variety to your veggie mix by grilling up others like potatoes, sweet potatoes, carrots, and eggplant. I would avoid leafy greens as they tend to shrink when grilled.
Flavor Enhancers: Customize and add flavor to your vegetables by topping them with lemon pepper and Italian seasonings. You can even add a sprinkle of parmesan or feta as a cheesy touch.
Save Marinade: Save extra marinade to toss vegetables in after grilling. This gives them added flavor.
What to Serve With Grilled Vegetables
Grilled vegetables work wonderfully as a classic barbecue side, but the best part about them is that they are so versatile, the choices of what to serve them alongside are endless. I have been liking to throw these into stir-fries for a pop of marinated veggie deliciousness, add them on a bed of pasta for texture, and in tin foil packets for a juicy, ready-to-go meal. They are also great on skewers because they not only have a gorgeous variety of colors but taste good too. I am excited to hear how you work these delicious veggies into your favorite recipes!
Allow grilled vegetables to cool completely before storing or they may get soggy. Also, try to keep your vegetables stored in thin layers as they will not keep as well when stacked on top of each other.
In the Refrigerator: Keep vegetables either tightly wrapped in plastic wrap or in an airtight container. They will keep for up to 3 days.
In the Freezer: Store in an airtight container. Grilled vegetables will keep in the freezer for 8-12 months. There is no need to thaw when reheating.
Reheating: To preserve their perfectly charred outside and tender inside, I like to reheat grilled vegetables in the oven for 10 minutes at 425 degrees Fahrenheit. You can also reheat them in a skillet or in an air fryer for a few minutes at 370 degrees Fahrenheit. This is a super easy thing to have on hand for snacks or to add to other dishes in a snap.
Other Super Easy Veggie Recipes
Try these other quick and easy vegetable recipes that are so good, you can have them as either a side or a meal! I know you will love their amazing flavor and tender texture as much as my family and I do!
These delicious grilled vegetables are the perfect side to enhance any meal. They are drizzled with a savory garlic marinade that amplifies each vegetable's amazing flavor and texture!
Course Side Dish
Cuisine American
Keyword best grilled vegetables, griled vegetables, grilled vegetables recipe
Prep Time 10minutes
Cook Time 20minutes
Total Time 30minutes
Servings 6people
Calories 146kcal
Author Alyssa Rivers
Ingredients
2zucchinisliced
8ouncemushrooms
1stalk asparagus
2yellow squashsliced
2corn on the cobcut into thirds
1red onionsliced ½ inch thick
Marinade:
1/4cupolive oil
3garlic clovessliced
1/2teaspoonpepper
1/4teaspoonsalt
1/2teaspooncrushed red pepper
1/2lemon juiced
Instructions
Add bell pepper, zucchini, mushrooms, asparagus, squash, corn and red onion to a large bowl.
To make the marinade:
In a small bowl add the olive oil, garlic, pepper, salt, crushed red pepper and lemon juice.
Pour on top of the veggies and toss.
Preheat the grill to medium high heat. Add the veggies to the grill. You can also use a basket for the grill.
Cook the mushrooms, asparagus, for about 3-4 minutes and the rest of the veggies for 5-7 minutes until they start to soften and have a nice char.
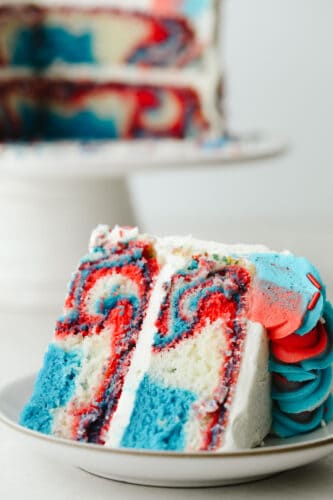
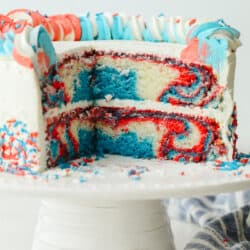
This Red, White and Blue Cake is going to steal the show for your 4th of July celebrations! Tender moist cake is swirled in the sweetest tie-dye pattern!
One of my favorite holidays is the 4th of July. I love the reason why we celebrate and all the festivities that come with it. The parades, the patriotism and of course the fireworks.Then there is the food! BBQs and family gatherings call for amazing dishes and even better desserts. This red, white and blue cake with it’s tie-dye effect is going to be the hit of the party.
Not only does this look dazzling, but it also tastes spectacular. The inside is tender, moist, and has that perfect density that you want in a cake. The almond and vanilla flavors combine to create a unique smooth flavor that is balanced with the buttercream frosting. Adding the swirls looks hard but it is super easy, your family and friends are going to be impressed for sure! Make this red, white and blue cake this holiday and it will definitely be a crowd-pleaser!
Ingredients For the Tie-dye Cake
Red, white and blue cake is the perfect holiday dessert this Fourth of July! All ingredients are listed below with the measurements in the recipe card.
All-Purpose flour: All-purpose flour will provide the cake with the structure you need.
Baking powder: This helps give the cake rise and fluff.
Baking soda: Make sure your baking soda is fresh so that your cake will cook up light and fluffy.
Salt: Salt will balance all the flavors.
Butter softened: Have the butter at room temperature or soften it in the microwave, but do not melt it.
Granulated sugar: Sweet white sugar provides sweetness and moisture.
Egg whites: Have your egg whites at room temperature by removing them from the fridge an hour or more ahead of time.
Vanilla extract: Vanilla gives the cake a classic scrumptious flavor.
Almond extract optional: This is optional but it provides an incredible flavor you are going to love.
Milk whole: Using whole milk will provide a lovely rich, moist, and tender cake.
Sour cream: Don’t question this secret ingredient, it provides a moist cake with a bit of tang you are going to love!
White vinegar: Vinegar makescake fluffy yet still moist. The acidity helps set the proteins in the flour.
Red Food Coloring and Blue Food Coloring: To avoid adding more liquid to your batter try using a food coloring gel.
Red White and Blue sprinkles: Look for these where they sell the sprinkles at your store. These are optional too.
Buttercream Frosting Ingredients
Butter: Set your butter out a few hours before needed so it’s good and soft, but not melted.
Powdered sugar: Sift your powdered sugar so it mixes in smoothly.
Vanilla extract clear, if bright white icing is desired: If you can’t find this in your local grocery store you can find clear vanilla where they sell cake decorating supplies.
Pinch of salt: This will balance out the sweetness.
Heavy cream more if needed: This is only if you need to thin the frosting out a bit to make it spreadable.
How to Make the Red, White, and Blue Swirly Cake
This is so much easier than you think and the effect is stunning!
Prep: Preheat the oven to 350°. Spray two 8 inch round cake pans with cooking spray and dust with flour. Set aside.
Dry ingredients: In a medium bowl, sift together the flour, baking powder, baking soda, and salt. Set aside.
Cream: In the bowl of your mixer, beat the butter until creamy. Add the sugar and beat again for about 3-5 minutes on medium-high speed until it turns white and fluffy. Mix in the egg whites one at a time and mix on medium until each one is fully mixed in.
Combine: Add the extracts, milk, sour cream, and vinegar to the butter mixture and mix on medium speed until combined. Add the dry ingredients and mix until just combined.
Color: Split the batter evenly into three bowls. Tint one bowl red and one bowl blue. To get the tie-dyed effect you will layer scoops of colored batter into the cake pans. One scoop red followed by one scoop white and one scoop blue, repeated until each pan has about ⅓ of each color of batter.
Cook: Bake for about 35-40 minutes, until the top of the cake springs back when lightly touched and a toothpick comes out clean from the center.
Cool: Allow to cool in the pan on a cooling rack for about 10 minutes before turning upside down on the cooling rack to cool the rest of the way. Cooling the cakes upside down levels out the top so you have nice flay layers that make getting a level cake very easy.
Freeze or Frost: Once the cake has cooled, you can either wrap the layers in plastic wrap and store them in the fridge overnight (chilled layers are typically easier to frost) or you can frost them the same day.
How to Frost the Firecracker Cake
Frost and Layer: On a cake stand or plate, place one layer top-down. Add a generous dollop of frosting on top and smooth it evenly. Place the second layer and another dollop of frosting smoothed over the top. Add the top layer upside down and another dollop of frosting on top. Smooth a thin layer of frosting around the outside of the entire cake as a crumb coat. Chill in the fridge for 15-20 minutes.
Frost the outside: Frost the outside of the cake. If you have a bench scraper or cake spatula, you can use this to get nice smooth sides and sharp corners at the top of the cake.
Make it pretty: Use a large star tip, such as the Wilton 1M, to pipe a border around the top. Press sprinkles around the bottom of the cake and, if desired, sprinkle around the top border.
Mixing the Frosting Together
Mix: In the bowl of a stand mixer, beat the butter until light and fluffy. Scrape down the sides of the bowl and add the powdered sugar 1 cup at a time, mixing at low speed until incorporated. Once all the sugar has been added, add the salt and the vanilla. Increase the speed to medium and beat for 2-3 minutes.
Make a tint: If desired, tint a small amount of frosting red and a small amount blue for the border at the top of the cake.
Red, White, and Blue Cake Tips
The cake is going is going to impress as well as taste absolutely indulgent!
Sour Cream: Adding sour cream to the cake adds moisture and a rich texture to the batter without thinning it out. It will also activate the baking soda because of the acidity which gives helps the cake rise. Trust me you are going to love having sour cream on your cake.
Vinegar: This might seem like a weird ingredient, but it will make a huge difference in the texture of your cake, and do not worry it won’t taste like vinegar at all. The vinegar helps the protein in the flour to stabilize leaving a super moist yet fluffy cake.
Do not stir: As tempting as it might be, to get the tie-dye swirl effect do not stir the colors together once placed in the tins. They will mix and become purple instead of individual colors. To create more intricate designs, drop your colored batter in a different pattern, small dollops, big dollops, etc, but do not stir.
Chill: To make frosting your cakes easier be sure to chill them. This helps the cake firm up and the outside won’t leave crumbs in your frosting.
Food coloring: I have found that using gel food coloring produces the brightest and most vibrant colors. You definitely do not want to under color your frosting.
Sparklers: Using sparklers is obviously optional but it sure does look amazing. Just be sure to light them and serve outside if you use the sparklers.
Variations and Storage of Tie-dye Cake
This is going to look absolutely fabulous once cut.
Tin: You do not have to make this in cake tins. You can make them in a 9×13, a bundt tin, or even cupcakes. Be sure to follow the same process for the cupcakes to get the swirl.
Coloring: You can use the same cake recipe but use different colors to fit your celebration or holiday. Use red and green for Christmas. Blue and pink for a baby shower or a child’s favorite color for a birthday cake to impress.
Decorations: There are so many different ways you can decorate this, you can color the frosting, add sprinkles, cookies, and whatever else you can think of. Frosting a cake is like painting on a blank slate. It is all about your imagination.
Storage: To keep this cake fresh, cover lightly and keep it at room temperature for up to 3 days. It can keep even longer in the fridge, but take it out about an hour before serving so it can come to room temperature.
Freeze: The cake can be frozen unfrosted for up to 2 months. It can be frosted frozen or let thaw partially before frosting.
More 4th of July Recipes
The 4th of July is a favorite holiday, not only because of what we are celebrating but it is a good excuse to make some pretty amazing food. Being summertime it is a great opportunity to have a BBQ or picnic. Whether you are hosting or bringing a side dish, I have all the recipes you need here on the blog for the perfect meal. Here are a few ideas to get you started!
This Red, White and Blue Cake is going to steal the show for your 4th of July celebrations! Tender moist cake is swirled in the sweetest tie-dye pattern!
Course Dessert
Cuisine American
Keyword red white and blue cake
Prep Time 45minutes
Cook Time 45minutes
Total Time 1hour30minutes
Servings 12slices
Calories 1043kcal
Author Alyssa Rivers
Ingredients
Cake
2 and 1/3cupall purpose flour
2teaspoonsbaking powder
½teaspoonbaking soda
2teaspoons salt
1 ½cupbuttersoftened
1 ¾cupgranulated sugar
6Egg whitesroom temperature
2teaspoonsvanilla extract
1teaspoonalmond extractoptional
1 ½cupmilkwhole
½cupsour cream
2Tablespoonswhite vinegar
Red Food Coloring
Blue Food Coloring
RedWhite and Blue sprinkles
Frosting
1poundunsalted buttersoftened
8cupspowdered sugar
1Tablespoonvanilla extractclear, if bright white icing is desired
pinchof salt
1-3Tablespoonheavy creammore if needed
Instructions
How to Make the Cake
Preheat the oven to 350°. Spray two 8 inch round cake pans with cooking spray and dust with flour. Set aside.
In a medium bowl, sift together the flour, baking powder, baking soda and salt. Set aside.
In the bowl of your mixer, beat the butter until creamy. Add the sugar and beat again for about 3-5 minutes on medium high speed until it turns white and fluffy. Add in the egg whites one at a time and mix on medium until each one is fully mixed in.
Add the extracts, milk, sour cream and vinegar to the butter mixture and mix on medium speed until combined. Add the dry ingredients and mix until jut combined.
Split the batter evenly into three bowls. Tint one bowl red and one bowl blue. To get the tie-dyed effect you will layer scoops of colored batter into the cake pans. One scoop red followed by one scoop white and one scoop blue, repeated until each pan has about ⅓ of each color of batter.
Bake for about 35-40 minutes, until the top of the cake springs back when lightly touched and a toothpick comes out clean from the center.
Allow to cool in the pan on a cooling rack for about 10 minutes before turning upside down on the cooling rack to cool the rest of the way. Cooling the cakes upside down levels out the top so you have nice flay layers that make getting a level cake very easy.
Once the cake has cooled, you can either wrap the layers in plastic wrap and store in the fridge overnight (chilled layers are typically easier to frost) or you can frost them the same day.
On a cake stand or plate, place one layer top down. Add generous dollop of frosting on top and smooth evenly. Add the second layer and another dollop of frosting smoothed over the top. Add the top layer upside down and another dollop of frosting on top. Smooth a thin layer of frosting around the outside of the entire cake as a crumb coat. Chill in the fridge for 15-20 minutes.
Frost the outside of the cake. If you have a bench scraper or cake spatula, you can use this to get nice smooth sides and sharp corners at the top of the cake.
Use a large star tip, such as the Wilton 1M, to pipe a border around the top. Press sprinkles around the bottom of the cake and, if desired, sprinkle around the top border.
How to Make Frosting
In the bowl of a stand mixer, beat the butter until light and fluffy. Scrape down the sides of the bowl and add the powdered sugar 1 cup at a time, mixing on low speed until incorporated. Once all the sugar has been added, add the salt and the vanilla. Increase the speed to medium and beat for 2-3 minutes.
If desired, tint a small amount of frosting red and a small amount blue for the border at the top of the cake.


No comments:
Post a Comment