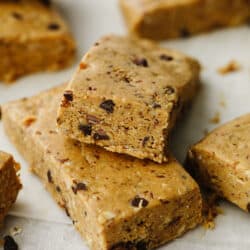
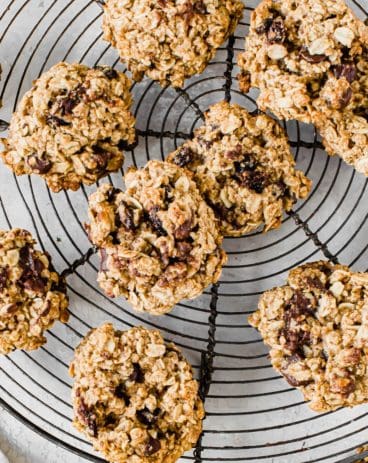
These healthy and easy to put together protein bars are the perfect snack to start the year off right! It’s so simple and delicious, you will never buy them from the store again!
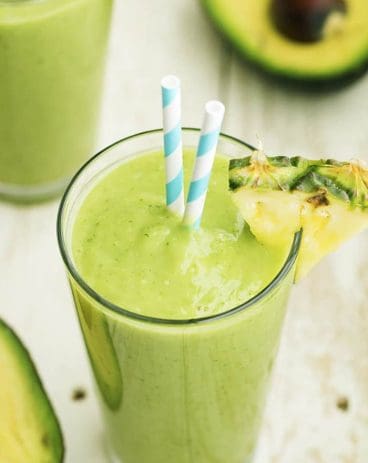
Some other healthy snacks for the new year that you should try are these protein poppers, protein waffles, and this delicious green smoothie. They are all some that you MUST TRY this new year!
The Best Protein Bars
I know that you can just go out and buy protein bars at the store but trust me when I say that these are SO MUCH BETTER. Plus, they aren’t filled with all of the ingredients that you can’t pronounce! These are filled with healthy ingredients like flaxseed and oats. And then you bring in the flavor with your protein powder, honey, peanut butter, and a few mini chocolate chips.
The great thing about these protein bars is that once you have all of these ingredients on hand then you can just make these whenever! Make them ahead of time and use them all week long. They are a great source of protein and actually taste super delicious. You will never go back to your store-bought ones again! You can use these as a midday snack or pair them with a delicious smoothie or oatmeal for breakfast. They only take a few minutes to put together so there shouldn’t be anything stopping you!
Ingredients to Make Protein Bars
Just buy all of these ingredients in bulk so that you always have the stuff on hand to make this. Once you try them, you won’t be able to quit! See the recipe card at the bottom of the post for exact measurements.
Peanut butter: This gives these protein bars a great flavor.
Honey: The honey acts as a natural sweetener.
Flaxseed: I like to use ground flaxseed. It’s healthy and easy to find.
Rolled oats: You can use slightly ground oats or oat flour will work too.
Protein powder: I used vanilla but chocolate tastes amazing too!
Salt: This enhances all of the flavors of the ingredients.
Vanilla extract: Adding a little more sweet flavor.
Mini chocolate chips: These are optional but I always like to add them in for extra taste and texture.
Let’s Make Some Protein Bars!
These are done and ready to eat in less than 30 minutes. Make an entire batch or even double it so that you are set for the entire week!
Prep: Line an 8×8 baking dish with parchment paper and set aside.
Combine everything except chocolate chips: In a medium bowl, add all of the ingredients except the chocolate chips. Stir and mix ingredients until combined. The mixture should resemble cookie dough.
Fold: Fold in the chocolate chips.
Press into pan: Using your hands, press the mixture into the prepared pan.
Chill: Place in the refrigerator to chill for 20 minutes to make cutting easier. You can speed up this process by placing the bars in the freezer for 10 minutes.
Cut: Once the bars are chilled and hold its form, use the parchment paper to lift the bars out of the pan. Evenly cut into 10 bars. Enjoy!
Variations
These protein bars are great as is but you can totally switch a few things up to make a variety. Here are a few ideas to try!
Protein powder: I used vanilla in this recipe but feel free to change it up to whatever your favorite flavor is! Chocolate, strawberry, cake batter…I mean the options for flavors of protein pwder are endless!
Mix-in: I used mini chocolate chips to mix into these but make them fun by adding in mini m&m’s, reeses pieces, sprinkles, or whatever you love! Mix in whatever you enjoy so that you love these even more.
How to Store Protein Bars
Cook up a few batches of these at once. They last a long time (over a month) and so it’s nice to make a lot of them to last!
Refrigerator: Once you have made a batch (or two!) of these protein bars, you will want to store them in an airtight container and put them in your fridge. This will keep them nice and chewy. They will last about a month in your fridge.
Freezer: You can totally freeze some of these protein bars for later. Wrap each bar in some parchment paper and then place them in a ziplock bag that is labeled with the date. They will last about 3 months. When you are ready to eat them just set it out on the counter until it is thawed and then enjoy!
More Healthy Snacks to Try
We all love some sweets but now that the holidays are over, my body is craving some healthy snacks! And don’t get me wrong, I love a good dessert… But who says that things have to taste bad if they are healthy?? These snacks will prove that wrong! You can eat healthier AND enjoy yourself!
These healthy and easy to put together protein bars are the perfect snack to start the year off right! It's so simple and delicious, you will never buy them from the store again!
Course Snack
Cuisine American
Keyword homemade protein bars, protein bars
Prep Time 10minutes
Chill Time 20minutes
Total Time 30minutes
Servings 10bars
Calories 345kcal
Author Alyssa Rivers
Ingredients
1 1/2cupspeanut butter
1/3cuphoney
1/4cupground flax seed
1 1/4cupsrolled oats, slightly ground (oat flour works too)
1/2cupvanilla protein powder (chocolate can be used)
pinch salt
1tspvanilla extract
1/4cupmini chocolate chips
Instructions
Line an 8×8 baking dish with parchment paper and set it aside.
In a medium bowl, add all of the ingredients except the chocolate chips. Stir and mix ingredients until combined. The mixture should resemble cookie dough.
Fold in the chocolate chips.
Using your hands, press the mixture into the prepared pan.
Place in the refrigerator to chill for 20 minutes to make cutting easier. You can speed up this process by placing the bars in the freezer for 10 minutes.
Once the bars are chilled and hold their form, use the parchment paper to lift the bars out of the pan. Evenly cut into 10 bars. Enjoy!
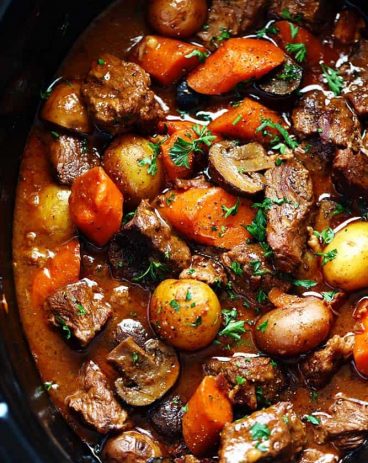
This hearty and delicious soup is full of ham, potatoes, veggies, and real cheddar cheese. It is so good and has become an instant favorite at our house!
I couldn’t hold back on this soup any longer! It is one of the BEST soups that we have ever had! It’s a great soup to make too if you have any leftover ham. I loved how hearty this soup was. Full of ham, potatoes, carrots, and corn it all comes together so well and makes this soup delicious. Plus, it’s simple and easy to make and you can have dinner ready in less than 30 minutes.
But let’s talk about the cheese… The cheddar base of this soup was hands down my favorite part! You will not believe how amazing the real cheddar cheese tastes and how it adds such great flavor to this soup. As soon as I had a taste I couldn’t wait for my family to try it! It was such a huge hit at dinner that the soup pot was completely scraped clean. We loved it at our house and I know that you guys are going to rave about this recipe!
Ingredients to Make Ham and Potato Cheddar Soup
This list of ingredients is simple and easy. You probably already have all of these items in your kitchen! See the recipe card at the bottom of the post for exact measurements.
Potatoes: Peel and dice your potatoes to put into the soup.
Chicken broth: This adds in so much flavor to the base of the soup.
Carrots: If you want to save some time then buy a bag of matchstick carrots from the store. Then you can just measure and dump them in!
Onion: After you chop up this onion, it will add so much flavor to the soup!
Butter: I used unsalted butter with this recipe.
Flour: All purpose flour works great for this soup!
Milk: I used 2% milk but whatever you have on hand will work just fine.
Salt and pepper: Use these to taste to add to and enhance the other flavors.
Sharp cheddar cheese: I like to shred the cheese from a block. It will melt better in the soup because it doesn’t have a coating on it like pre-packed shredded cheese does.
Ham: Make sure that your ham is precooked. You can even by precooked ham that already comes cubed at the store if you want to save some time!
Corn: I used frozen corn in this recipe.
Let’s Make Some Soup!
This ham and potato cheddar soup only will take about 30 minutes from start to finish. So get cooking and you will have a hearty and delicious soup ready in no time!
Cook vegetables: In a large saucepan, combine the potatoes, chicken broth, carrot and onion. Bring to a boil. Reduce heat and cover and cook for 10-15 minutes or until potatoes are tender.
Make a roux and then mix everything together: Meanwhile, in another saucepan, melt butter. Stir in flour until smooth. Gradually add the milk, salt and pepper. Bring to a boil and cook and stir for 2 minutes or until thickened. Stir the mixture into the potatoes and chicken broth. Stir in cheese until melted. Add ham and corn. Heat though.
Bread for Dipping
Isn’t soup just that much better when you have some delicious bread to dip in it?! Here are some ideas of bread that you can make to go with this ham and potato cheddar soup.
Rolls: Homemade rolls just cannot be beat! You can make these super easy 1-Hour Rolls or these tried and true Lion House Rolls
How to Store Leftovers
This soup is great the next day for lunch or dinner. When the soup has cooled then place it in an airtight container and put it in the fridge. It will last 3-4 days.
More Delicious Soup Recipes
Soups are so good, especially during cold winter months. But let’s be honest. I love them so much that I cook them all year long! I’ve rounded up a few more of my favorite soup recipes that I think that you and your family will love! There are a bunch of different types and flavors so there should be something for everyone!
This hearty and delicious soup is full of ham, potatoes, veggies, and real cheddar cheese. It is so good and has become an instant favorite at our house!
Course Dinner, Main Course, Soup
Cuisine American
Keyword ham and potato cheddar soup, soup recipe
Prep Time 15minutes
Cook Time 15minutes
Total Time 30minutes
Servings 6Servings
Calories 383kcal
Author Alyssa Rivers
Ingredients
2cupspotatoespeeled and diced
2cupschicken broth
1/2cupcarrotsliced
1/4cuponionchopped
1/4cupbuttercubed
1/4cupall-purpose flour
2cups2% milk
¼ to 1/2teaspoonsalt
1/4teaspoonpepper
2cupssharp shredded cheddar cheese8 ounces
1-1/2cupshamcubed cooked
1cupcorn
Instructions
In a large saucepan, combine the potatoes, chicken broth, carrot, and onion. Bring to a boil. Reduce heat and cover and cook for 10-15 minutes or until potatoes are tender.
Meanwhile, in another saucepan, melt butter. Stir in flour until smooth. Gradually add the milk, salt, and pepper. Bring to a boil and cook and stir for 2 minutes or until thickened. Stir the mixture into the potatoes and chicken broth. Stir in cheese until melted. Add ham and corn. Heat through.
Notes
Updated on January 3, 2022Originally Posted on December 7, 2015
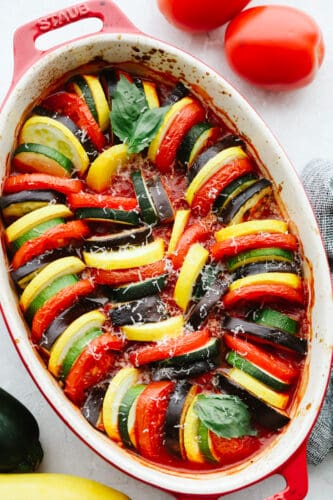
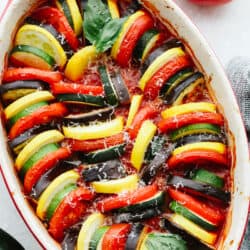
This ratatouille is made up of delicious sliced vegetables that are seasoned to perfection and cooked in a delicious sauce. It’s so good that you will want to add it as a side to every meal!
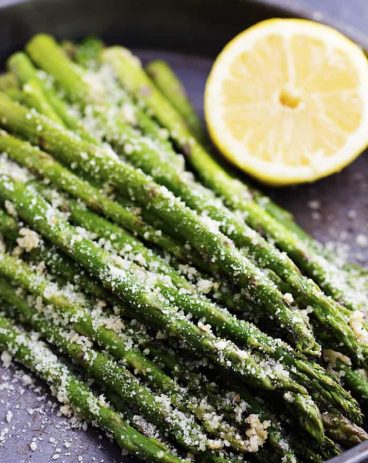
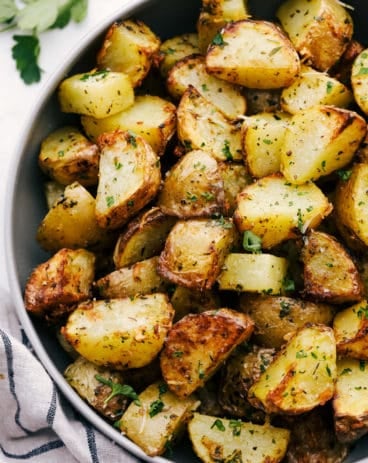
If you love vegetable side dishes like this one then you MUST TRY these potatoes, carrots, or even this asparagus. They are all amazing which makes it hard to pick a favorite!
What is Ratatouille?
If you have kids then I’m sure that you’re familiar with the movie called Ratatouille but what exactly is the food? Well, trust me when I tell you that this dish is one of the best ways to cook up some vegetables! Ratatouille is thinly sliced vegetables such as eggplant, squash, zucchini, and tomatoes that are seasoned and baked in a delicious sauce.
Ratatouille not only makes an excellent option for a side dish but it is completely filling on its own. Serve it with a French baguette or even some delicious garlic bread. I love using the sauce to dip them in! This recipe is simple to make but when you see it finished all baked and full of color, you will see that it not only tastes amazing but it looks so fancy! Try it out, I think it will become a favorite!
Ingredients in Ratatouille
These ingredients are so delicious and easy. The sauce that these vegetables are cooked in makes my mouth water! See the recipe card at the bottom of the post for exact measurements.
Extra virgin olive oil: The extra virgin olive oil is adds a delicious flavor.
Garlic cloves: If you don’t have fresh garlic cloves you can use minced garlic. ½ tsp equals about 1 clove of garlic.
Yellow onion: This is going in your sauce so chop the pieces up really small.
Crushed tomatoes: This will be used as the base of the sauce.
Balsamic vinegar: Balsamic vinegar brings the best flavor to this sauce.
Italian herbs: This will bring in those classic herb that you typically see in a marinara sauce.
Sea salt: You will put this in to taste.
Vegetables: Zucchini, yellow squash, Japanese eggpant, tomatoes are classic in ratatouille.
How to Make Ratatouille
Ratatouille seems so intimidating but it’s really not! In less than an hour, you can have this steaming on your table and ready to eat!
Preheat and prep cooking dish: Preheat oven to 375°F. Spray a 1.5 qt. baking dish with non stick cooking spray. Set aside.
Make the sauce: For the sauce, heat a saucepan over medium low heat. Add the olive oil and onions. Sauté for a 3 minutes until the onions start to soften. Be careful not to brown the onions. Add the garlic and sauté for an additional minute. Add the crushed tomatoes, balsamic vinegar, Italian herbs, and salt. Stir and simmer for 5 minutes. Set aside.
Cut up the vegetables: Prepare the vegetables by cutting the ends off of each side. Using a sharp knife, cut all vegetables into the same thickness so they cook evenly. The eggplant may need to be quartered to match the size of the other vegetables.
Assemble in baking dish: To assemble the ratatouille, pour the sauce into the prepared baking dish. Next, layer the vegetables over the sauce by overlapping each vegetable. Arrange the vegetables in a consistent alternating pattern.
Season: Drizzle the olive oil over the vegetables, and season with salt and pepper.
Bake: Cover with foil and bake for 40 minutes, or until the vegetables are tender, not soggy.
Top and serve: Serve with fresh basil and grated parmesan. Enjoy!
Cooking Tips
I’ve come up with a few tips that will help your ratatouille turn out just right. In fact, this is going to taste so good that I bet it starts to turn up on your weekly menu at home!
Sliced vegetables: When you slice up your vegetables, try to make them all about the same size. That way they will cook evenly.
Keep it thick: If you want to keep your sauce from getting runny then stir it often. If it starts to become runny then turn the heat up a bit and continue stirring.
Double the recipe: This ratatouille tastes so good (if not better) the next day so if I were you, I would just cook up some extra all at the same time. You won’t regret it!
How to Store Leftovers
Ratatouille tastes extra good the next day because all of the flavors have really mixed together. Just place the leftover ratatouille in an airtight container and put it in your fridge. It can last for up to a week. When you are ready to eat it, you can just reheat it in your microwave for a minute or two until it’s heated through.
Make it a Meal!
If you’re not sure what to pair this with then I have some ideas for you! Make it a meal and pair it with all of these other recipes. It will be filling and hearty and will taste so good that it will knock the socks off of your family and friends! Happy eating!
This ratatouille is made up of delicious sliced vegetables that are seasoned to perfection and cooked in a delicious sauce. It's so good that you will want to add it as a side to every meal!
Course Dinner, main dish
Cuisine Italian
Keyword ratatouille
Prep Time 20minutes
Cook Time 40minutes
Total Time 1hour
Servings 6people
Calories 91kcal
Author Alyssa Rivers
Ingredients
Sauce
1Tablespoonextra virgin olive oil
2clovesgarlic, minced
1/4cupyellow onion, finely chopped
1(15 ounces)canned crushed tomatoes
1Tablespoonbalsamic vinegar
1Tablespoondried Italian herbs
1/4teaspoonsea saltto taste
Vegetables
2smallzucchini
2smallyellow squash
2smallJapanese eggplant
5roma tomatoes
1Tablespoonextra virgin olive oil
sea salt & pepper to taste
Instructions
Preheat oven to 375°F. Spray a 1.5 qt. baking dish with non-stick cooking spray. Set aside.
For the sauce, heat a saucepan over medium-low heat. Add the olive oil and onions. Sauté for 3 minutes until the onions start to soften. Be careful not to brown the onions. Add the garlic and sauté for an additional minute. Add the crushed tomatoes, balsamic vinegar, Italian herbs, and salt. Stir and simmer for 5 minutes. Set aside.
Prepare the vegetables by cutting the ends off of each side. Using a sharp knife, cut all vegetables into the same thickness so they cook evenly. The eggplant may need to be quartered to match the size of the other vegetables.
To assemble the ratatouille, pour the sauce into the prepared baking dish. Next, layer the vegetables over the sauce by overlapping each vegetable. Arrange the vegetables in a consistent alternating pattern.
Drizzle the olive oil over the vegetables, and season with salt and pepper.
Cover with foil and bake for 40 minutes, or until the vegetables are tender, not soggy.
Serve with fresh basil and grated parmesan. Enjoy!
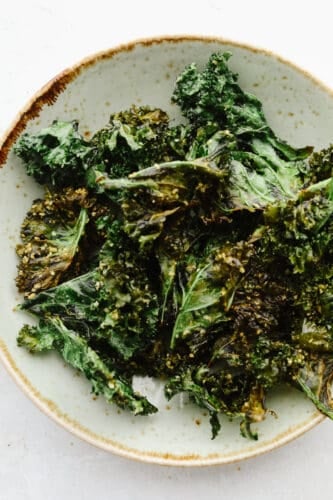
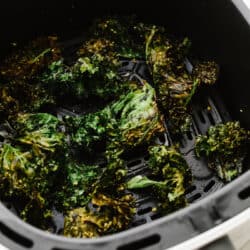
Crispy and seasoned perfectly with parmesan cheese, these kale chips that you cook in the air fryer are the BEST snack. They are quick and easy to make and I bet that you can’t stop at just one!
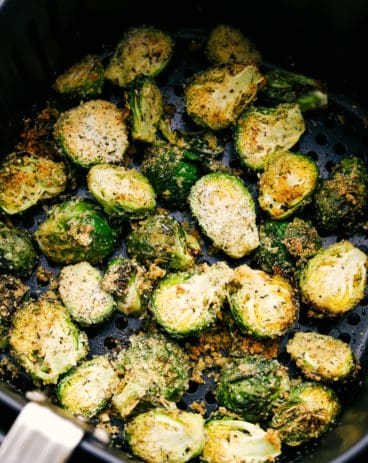
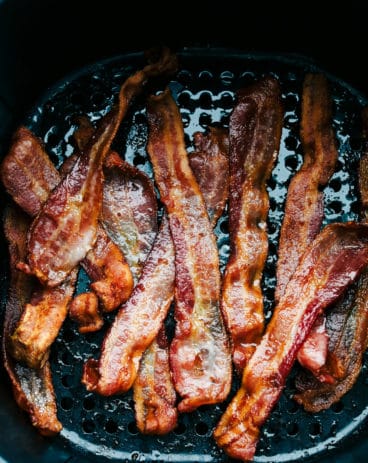
If you love simple and delicious air fryer snacks then try out these pickles, egg rolls, and these wings. They are all so good and make great appetizers to add to any party or get-together!
Air Fryer Kale Chips
I LOVE when I can cook things in my air fryer. Not only does it make everything crisp and fresh (I mean have you tried cooking leftovers in the air fryer…it’s brilliant!) but it’s kind of a set it and forget it deal. And it’s not just small appetizers that you can cook in it. I can have chicken,pork, and even steak at my disposal in a few minutes’ time. And it is always cooked to perfection.
These air fryer kale chips are the best example of taking an ordinary vegetable and turning it into a delicious snack! The parmesan cheese that is sprinkled on top adds in a yummy flavor and then they are cooked to be perfectly crisp. I love to make these when I want a savory snack but don’t want to load up on unhealthy food. These kale chips are the best of both worlds. I can eat something delicious and it’s a superfood vegetable!
Ingredients to Make Air Fryer Kale Chips
These chips only take 4 ingredients. That’s it! So there is no excuse not to try these out right now! See the recipe card at the bottom of the post for exact measurements.
Kale: Make sure that it’s completely washed and dried!
Olive oil: This helps the seasonings stick to the kale.
Parmesan: I used parmesan from the can in my fridge but you could sprinkle on fresh too!
Salt and pepper: Sprinkle these on to taste.
Let’s Make Some Chips!
If you thought the ingredient list for these air fryer kale chips was simple then just check out these instructions… It doesn’t get much easier than this!
Clean the kale: Rinse and dry the kale. Remove the leaves from the stem and tear into small pieces.
Toss: In a medium sized bowl add the kale, olive oil, parmesan, salt and pepper and toss to coat.
Place in air fryer: Lay the kale in a single layer in the bottom of your air fryer.
Cook: Cook at 360 degrees for 7 minutes or until crisp.
Cooking with an Air Fryer
Whether this is your first time cooking with an air fryer or you’re an old pro, I have some tips for you! There are a few things that you can do to make sure that your air fryer foods turn out just right.
Don’t overcrowd the basket: Make sure that you cook things in layers, one at a time. The basket should only be filled with one layer, don’t stack anything! This makes it so that your food will cook unevenly. It’s best do do a bunch of bathes then to try and cram more in at once… Trust me, your food won’t turn out!
Preheat the air fryer: Before you start cooking, press the preheat button on your air fryer. If yours doesn’t have this then set the air fryer to the temperature that you are cooking your food at. Then turn it on for about 3 minutes at that temperature before you put your food in!
Don’t use aerosol spray: If you want to put some grease in your air fryer beforehand then just rub a little bit of oil on the bottom of the grate. This will help your food not stick. Don’t use spray cans (like pam) because they can cause chipping and aren’t good for your air fryer.
How to Store Leftovers
If you have leftover air fryer kale chips then once they are cooled, place them in a paper bag. Roll it up so that no air can get in it and keep it closed when you aren’t eating them. The paper bag will absorb any moisture and makes it so that your chips don’t get soggy!
More Air Fryer Recipes
If you are as crazy about air fryer recipes as I am then you MUST TRY these ones. I have gathered up a few more of my favorites and they are so good. I am a little obsessed with how easy and delicious they are. Try them out, I bet the hardest part will be picking out your favorite!
Crispy and seasoned perfectly with parmesan cheese, these kale chips that you cook in the air fryer are the BEST snack. They are quick and easy to make and I bet that you can't stop at just one!
Course Snack
Cuisine American
Keyword air fryer kale chips, kale chips
Prep Time 5minutes
Cook Time 7minutes
Total Time 12minutes
Servings 4people
Calories 83kcal
Author Alyssa Rivers
Ingredients
1bunchKale
2Tablespoonsolive oil
1Tablespoonparmesan
salt and pepper
Instructions
Rinse and dry the kale. Remove the leaves from the stem and tear them into small pieces.
In a medium-sized bowl add the kale, olive oil, parmesan, salt, and pepper and toss to coat.
Lay the kale in a single layer in the bottom of your air fryer.


No comments:
Post a Comment