Ideal Home |
- A Hampshire home is invaded by bamboo from neighbour's garden, costing over £100k in repairs
- How to install a kitchen splashback – protect your walls in seven easy steps
- 45 small garden ideas to make the most of your outdoor space
- Energy price cap increase announced: what does this mean for your energy bills?
- Loft insulation grants – what is available?
| A Hampshire home is invaded by bamboo from neighbour's garden, costing over £100k in repairs Posted: 03 Feb 2022 11:00 PM PST A house in Hampshire has been invaded by bamboo from a neighbouring property. The invasive plant emerged in the living room, study, hall, and kitchen – resulting in over £100k in repairs. The bamboo originally formed part of a garden edging idea in a neighbour’s garden. It had been planted directly into the ground to form a screen.  Image credit: Environet UK Bamboo growing through Hampshire houseHidden below the surface of the house, it began to develop a vast network of rhizomes. These underground plant stems eventually burst up through the concrete floor. 'This is the worst case of bamboo encroachment and damage to property I've ever seen in this country,' says Nic Seal, founder of Environet UK. He explains that the homeowners suffered a huge financial cost. Plus, they had to vacate their home for several months. The entire ground floor of the house had to be dug up in order to excavate the hundreds of metres of bamboo runners underneath. ‘Running’ varieties of bamboo form lateral shoots that can travel over 1o metres.  Image credit: Environet UK Their ability to penetrate brickwork, drains, cavity walls and patios means they can cause more damage than Japanese knotweed, which is well known for devaluing houses if found nearby. Gardeners have long been warned of the risks with bamboo, but it remains a popular garden idea. ‘I would urge anyone considering planting bamboo to think twice,’ comments Nic. ‘And if you already have it growing in your garden, take action now to ensure it's properly contained.' You can prevent bamboo from spreading in your garden by choosing a clumping variety, rather than a running variety. Look for Bambusa, available at Amazon or Chusquea.  Image credit: Environet UK Always plant bamboo in a container or a strong pot – never directly into the ground or you’ll risk a similar The Day of the Triffids-style invasion. As well as buying the right type of bamboo and planting it in a pot, you’ll need to take steps to maintain it. It’s a good idea to prune your bamboo hard and regularly, at least every spring. Bamboo is considered a pretty low-maintenance plant, making it an easy garden idea – as long as you keep it in check. The post A Hampshire home is invaded by bamboo from neighbour's garden, costing over £100k in repairs appeared first on Ideal Home. |
| How to install a kitchen splashback – protect your walls in seven easy steps Posted: 03 Feb 2022 07:30 AM PST Designed to protect the walls directly above worktops, kitchen splashbacks are a great choice for busy family homes. With no grubby grout to clean, splashbacks are lower maintenance than tiles, and they also bring a lot to the party in terms of colour and design interest. Plus by learning how to install a kitchen splashback yourself it can be done on a budget! While it's not necessary to clad every inch of wall in splashback, you should definitely consider targeting the areas above the cooker and sink. This is where walls most come under fire from oily splashes and water damage. Used this way, in moderation, a stylish kitchen splashback idea can act as a focal point, drawing attention to an attractive cooker or designer sink. How to install a kitchen splashback Image credit: Future PLC Kitchen splashbacks are available in various materials but the most popular for DIY installation are made from glass (including mirrored glass), acrylic, laminate, stainless steel and other sheet metals, like brass and copper. Additional kitchen wall ideas worth exploring include panelling, tiles and even vinyl wallpaper. Always make sure you read the installation instructions before you buy a splashback, so you know what you are letting yourself in for and can get prepared with any tools or adhesives required. Take special care to check that the material you want to use is suitable for where you want to install it; some splashbacks are not designed to be used directly behind a gas hob for instance. Discover how to fit a kitchen splashback with our easy-to-follow guide. 1. Prepare the surface Image credit: Splashback Good preparation is everything. Time spent getting this first essential step right will pay dividends when it comes to attaching the splashback to your wall – and keeping it there! 'It doesn't matter what type of material you choose for your splashback, the surface you're putting it on has got to be flat, non-porous, dry and dust free,' advises Claire O'Brien, head of design at Splashback. The amount of effort required will depend on the current condition of your walls. If you have removed old tiles or ripped off a splashback panel, you may need to level any holes with filler. The surface needs to be non-porous, so that it won't suck up the adhesive. Fresh plaster will benefit from a thin coat of PVA or primer. Check the surface is flat using a spirit level or length of timber. Uneven surfaces can cause splashbacks to crack, especially those made from glass or acrylic, and can result in wonky gaps around the edges of any splashback. 2. Mark out the splashback position Image credit: IKEA Next plot out and mark the exact position you want to put your splashback on the wall. A single splashback panel should be carefully centred on the sink or cooker it is positioned above. If you are going full width with your splashback, and can do it in a single panel, it's only the height you need to mark out. Don't forget to use a spirit level to make sure your positioning is straight. Allow a 2mm gap around the splashback for expansion and sealant. Pay special attention to the distance between a hob/cooker and the splashback to avoid heat damage. Aim for at least 11cm between the hob and splashback for a gas hob, and 10cm for electric, but do check for any special instructions that apply to your chosen splashback. 3. Cut the splashback to size Image credit: B&Q The easiest route is to buy custom-cut splashbacks that are cut to your specific measurements before they arrive! Or you can buy standard size splashback panels in a vast range of sizes, which will also allow you to skip this step. The most popular readymade splashback panel sizes are 60cm x 75cm, 90cm x 75cm and 100cm x 75cm. Acrylic, laminate and thin sheet metals like aluminium and copper are the best options if you are determined to cut your own splashback to size. Use a fine-toothed blade that's designed for plastics or aluminium. You may need to buy a circular saw or other specialist power tool to achieve a neat finish. Always ask your supplier for advice. 'Mark out the dimensions on your splashback of choice before laying on a workbench. Add tape to the edges of where you will be cutting to avoid chipping the material. We also recommend laying your splashback on a soft material to avoid damage and ensure you're wearing the necessary protective gear when working around any sharp tools,' says Paul Bangs, Wickes' Category Director for kitchens. Then sand down the cut edges with a cork sanding block and 240 grit sandpaper. Always keep any protective film on the front of the splashback while you work. Cutting stainless steel and glass splashbacks is generally best left to the professionals, as it requires expensive, heavy-duty tools for perfect results. Regardless of who cuts your splashback, always do a dry fit to ensure you are happy with the size and position – checking it doesn't catch on any surrounding cabinets. 4. Apply adhesive Image credit: Future PLC While some heavy or out-sized splashbacks require screws for a firm fixing, the most popular way to attach regular glass, metal and other sheet-style splashbacks is by using a combination of double-coated foam tape and low modulus silicone adhesive. You can also buy splashbacks with pre-applied sticky backing that skips the need for extra adhesive. First apply strips of foam tape to the top, bottom, sides and middle of the back of your splashback, taking care not to overlap. Then, using a silicone gun, apply adhesive in the areas between, in a wavy pattern, again avoiding overlap. There's no need to go crazy, just aim for even coverage with 2-3cm wide gaps between. 5. Fix the splashback to the wall Image credit: Bushboard Remove the protective strip from the foam tape and firmly attach the splashback onto the wall, using your positioning lines for guidance. Apply gentle pressure evenly across the splashback, and check it is straight using a spirit level. 'Once it’s adhered to the wall, remove any visible gaps by sealing around every edge with the adhesive, then remove any excess to finish,' adds Paul Graham, installation expert at Bushboard. Use masking tape to hold the splashback in position while the adhesive sets – at least 24 hours but check the label on your adhesive for guidance. Once the adhesive is cured, peel away any protective film from the front of the splashback and wipe it down with a clean, damp cloth. 6. Seal the joints Image credit: Charlie Kingham When the adhesive is completely cured and the splashback is firmly attached with no movement, remove any masking tape used and apply a thin line of silicone sealant – no more than 2.5mm thick – around the edges. Take special care at the joint between the splashback and worktops as you don't want any major spills to get down the back of the cabinets. Do use a bathroom or kitchen grade silicone to ensure a watertight seal and help prevent mildew stains. If your edges are not as neat as you'd like, or you want to add a little extra definition, consider framing the splashback with off-the-shelf trimming strips. 'Framing a splashback panel draws attention to the material, making it feel extra space and also helps create a really tidy connection between the splashback and wall,' says kitchen designer, Charlie Kingham. 7. Add a protective finish, if required Image credit: Higham Furniture Splashbacks made from glass, acrylic, stainless steel and laminate won't need any further treatment to protect them from splashes and spills. However, if you are installing on-trend warm metallic splashbacks made from brass, copper or bronze sheeting, you might choose to apply a coating of sealant. 'Brass and copper splashbacks are beautiful but it's important to understand how reactive they are,' says kitchen designer, Ben Hawkswell, of Roundhouse. Direct exposure to moisture will alter the appearance and a mottled patina will gradually form in time and use. Some people love the aged look but if it's not for you, either buy ready-sealed metal splashbacks or apply a thin layer of metal lacquer using a fine foam paint roller. Are kitchen splashbacks easy to fit?While it's true that not all splashback materials are suitable for novice installation (for example fabricated surfaces like composite quartz and other stones), there are plenty of options aimed at keen DIYers. You can make life a lot easier for yourself by buying splashback panels that don't need to be cut. However, there's plenty of companies now offering custom cutting services using your own dimensions or templates, including cut-outs for switches and sockets, as well as a wide range of readymade sizes held in stock. Acrylic and laminate splashbacks are arguably the easiest to install yourself because they are lightweight, thin and are often supplied with self-adhesive backings. What are the easiest splashback panels to fit DIY?'Aluminium panel splashbacks are straightforward to install by any homeowner who is both confident making basic DIY updates and inclined towards carrying out projects at home. Splashbacks made from aluminium panels can be easily cut, drilled and shaped to fit required measurements using standard tools,' says Paul Graham, installation expert at Bushboard. 'Purpose-made laminate splashbacks are another great option for creating a sleek, uniform look when paired with a worktop in the same finish. Installation requires slightly more preparation and skill. However it's certainly a job that a competent DIY enthusiast could carry out independently, without expert help.'  Image credit: Wren How can you avoid joint lines when fitting a splashback?'Splashbacks are commonly available in a variety of dimensions, so in the first instance, I'd recommend choosing a size that best fits your space. However sometimes, particularly in larger areas, joining two panels is an inevitability,' says Paul Graham, installation expert at Bushboard. The best joining option depends on the material. Some metal splashbacks are available with specialist jointing plates that help achieve a neat connection. Otherwise, it's a case of butting the panels as close together as possible and using a clear or colour-matched silicone to create a watertight seal. How do you stick a splashback to the wall?To stick a splashback to the wall you can use two options. The first, and neatest because there are no visible fixings, is adhesive. Some splashbacks will adhere with double-sided sticky tape only, but most require a combination of silicone sealant and tape to help hold the splashback firmly in place while the silicone dries. Do read the installation instructions supplied with your splashback with regards to the type of silicone that will work best but, generally, a Low Modulus sealant (a.k.a. low mod) is preferred because it is slightly stretchy and can handle more movement than rigid High Modulus options. The second way to stick a splashback to the wall is using screws. In which case your splashback should come with pre-drilled holes and the requisite screws and rawl plugs. If you can put up a shelf, you shouldn't have any trouble screwing a splashback to the wall. The most important thing to remember is to not overtighten the screws. Use rubber washers if possible. Overtightening can crack or damage a splashback. The post How to install a kitchen splashback – protect your walls in seven easy steps appeared first on Ideal Home. |
| 45 small garden ideas to make the most of your outdoor space Posted: 03 Feb 2022 04:30 AM PST If you’ve got a spatially challenged outdoor space you might think you’re limited for what you can achieve. However, there are a tonne of wonderful and creative small garden ideas to transform even the tiniest plot. Petite spaces may require a little more thought than larger gardens, but they come with plenty of welcome advantages. For a start, it forces you to be a little more inventive, which can often result in serious style and beauty. The other big plus is that due to their size, more often than not they’re delightfully low-maintenance. So it’s time to get creative and start exploring what you could create with whatever space you have available. Small garden ideasWhether you’re looking to create an impressive balcony garden, squeeze garden furniture into a courtyard or fill a plot with greenery, you’ll find lots of small garden ideas to inspire you. 1. Think vertically Image credit: Future PLC Save precious outdoor square footage – be it lawn or patio – by taking what you can off the ground. If you have a wall or strong fence available, this is the ideal spot to affix a slim shelving unit. Alternatively, DIT it by exploring garden ideas with pallets. You can use these levels to display potted plants, keep smaller garden accessories, and to double up as somewhere to set your drink or hold your hat. 2. Make the most of a patio Image credit: Future PLC Patios and decks are just begging to be brightened up. Revive a dreary outdoor space by whitewashing brickwork and refreshing weathered wood. Create a cheery festival vibe by adding a stack of cushions and rigs in folksy florals and sunny brights. Not only will these patio ideas bring joy, but the pops of colour against a white backdrop will give the space an illusion of being bigger than it is in reality. Choose slightly small benches and rugs than normal to heighten this effect. 3. Create a layered look Image credit: Future PLC Layers don’t just add the illusion of depth when in your hair – they can go a long way in gardens, too. Combine both raised beds and ground levels beds to add height and create a layered look to your planting, implying the presence of much more foliage than there actually is. Additionally, slightly raising a path or walkway will make the ground level planting seem taller, too. It’s really beneficial to work out how to plan a small garden in advance of starting. 4. Take the indoors out Image credit: Future PLC/David Giles Make a small garden feel bigger by making it feel like a continuation of your indoor space with outdoor living room ideas. Making the most of the space makes it more valuable, no matter how small. Dress your small garden space with a furniture set and add decorative outdoor fairy light ideas to ensure it’s a space you want to spend more time. ‘Do not let attention to detail go amiss, the same principles apply externally as they do an interior project,’ says Emmie Brookman, Creative Director of Silver Mushroom. ‘Your outdoor space should be an extension of your home, so make it comfortable and accessorise the same way you would indoors. Introduce cushions, throws, candles and bowls, after all you can always take them back inside if the weather turns.’ Similarly, a plethora of potted plants adds foliage, but as pots are moveable you get a sense of freedom to change things around from time to time. 5. Create a mini herb garden Image credit: Sadolin Herb gardens don’t have to only exist on your windowsills or in a large dedicated vegetable patch. Upcycle a side or coffee table to create a homemade and bijou planting area, perfect for herbs. As well as saving you space beneath for extra planting or storage, by having the plants higher, you’ll sae your back a lot of strain that you might get from bending over veg beds. 6. Hang your plants Image credit: Future PLC Hooks go a long way in space saving in interiors, and they work just as well for small garden ideas. On a fence or exterior of your home, attach a few hooks and use this to hang smaller plants until they’re big enough to plant out or move into larger containers on the ground. Plus, if you’re ever off to a party and realise you’re missing a hostess gift, grab one of these and voila, problem solved! 7. Choose slimline options Image credit: Dunelm Slot in a slimline plant stand in smaller outdoor spaces. Cover bare areas of fence or brickwork with plants and trailing greenery and then look vertically for extra planting. Add a ladder stand to add height to displays – it’s one of the easiest budget garden ideas and easy to move if you fancy a change. 8. Add a gallery wall Image credit: Future PLC/Tim Young In the same way you would hang pictures indoors, create a display of frames and wall hung planters on an outside wall, fence or shed. Utilise junk shop finds by hanging old wooden frames and up-cycle old loaf tins as planters. Just drill holes in the base for drainage and in the side for hooking onto the wall. Hang above a pretty garden bench, as you would a sofa indoors and finish off with some cushions and a throw. 9. Create a mini outdoor kitchen Image credit: Future PLC/Tim Young Extend your kitchen capacity into the garden. Potting tables can provide a slim, compact surface along one side of a patio for outside food prep, choosing units with galvanised or zinc topped surfaces will make wipe-down easier and protects wooden surfaces from weather damage, too. Hang a bamboo pole above your units from cup hooks screwed into the wall or fence and use S-hooks to hang kitchen utensils along its length. 10. Double your space Image credit: Future PLC/Tim Young When working out how to make a small garden look bigger, one foolproof idea is to use garden mirrors. Create your own using an old gate or some painted trellis mounted onto a piece of mirrored board. This is not only an inexpensive alternative to an outdoor mirror it also prevents any danger through mirror breakage. Set a table close by so that you can enjoy a view of the garden wherever you are seated. Top tip: using a grid style mirror means that birds are less likely to fly into it. 11. Create a kids corner Image credit: Future PLC/Tim Young Sacrifice a raised bed to create a section of deck with a giant blackboard and covered sandpit for some sunny-day play. Try using old railway sleepers to create a barrier for sand and soil. Finish by fixing a peg rail to the underside of the sandpit lid for hanging toys and tools. 12. Set up a private bar Image credit: Future PLC/Tim Young Look to outdoor bar ideas to create your own little entertaining zone with a clever pull-down bar made from a couple of pallets and a length of chain. Cut the top section from the pallet to use as the flip down section and attach using two strong hinges and lengths of chain. Adding an outdoor herb planter to the top section will keep them within easy reach for drinks and barbecues. 13. Hang furniture to free up floorspace Image credit: Future PLC/Tim Young/Charlie Young When working with small indoor spaces, designers will explain the importance of elevating furniture off the floor to create the illusion of more floor space. Wall-mounted bathroom units are a prime example of where this applies. Use the same design idea in a small garden by choosing a hanging chair. A nook of a garden is all you need for a reading corner, the perfect place to get away from it all. This hanging bamboo chair keeps the floor and sightline clear giving a feeling of space in even the smallest of spaces. Highlight the area with clusters of pots that contain foliage at varying heights and scales and mix up shop bought planters with vintage buckets or troughs. Mix materials like zinc, rattan and terracotta, to give your garden an effortless layered up look. 14. Make a small space work harder Image credit: Future PLC/Colin Poole Divide your garden into zones to gain the illusion of extra space. With individual purposes, the space will feel larger because of the multifunctional uses and outdoor ‘rooms’. Depending on available space, and what you like to do, there’s a multitude of zones you could create. Think an entertaining space, reading nook, outdoor kitchen ideas, play area, vegetable plot… the garden’s your oyster! 15. Enliven the space with colour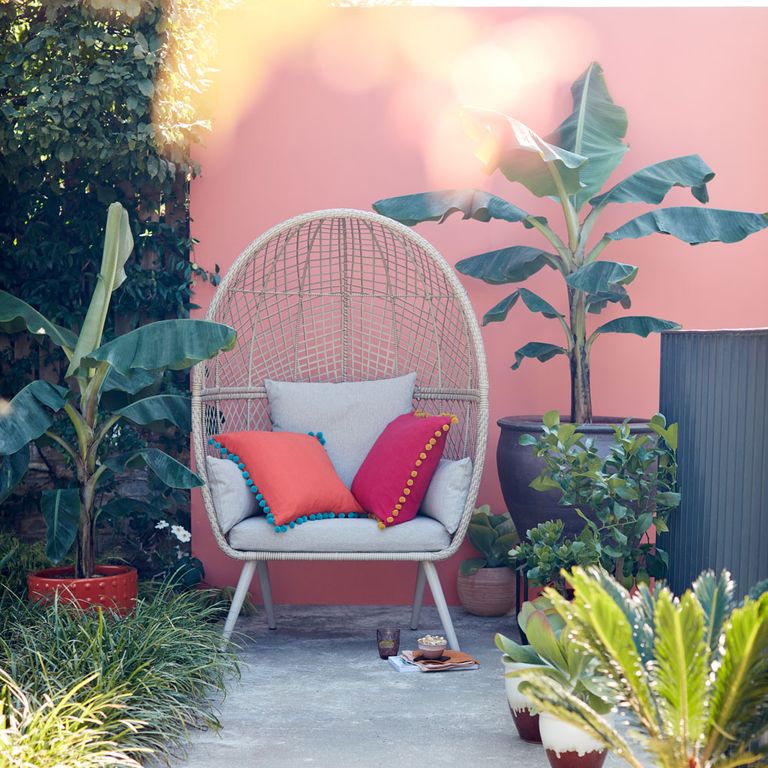 Image credit: Dobbies As with interior decorating, think of how using colour can help invigorate an outdoor space. Use small garden ideas to add depth to the space with using garden paint ideas to paint the walls in a vibrant shade. A flash of bold colour allows the plants to really pop against the colourful backdrop – creating an illusion of a sense of space. Not to mention the mood-boosting power a splash of colour can have on the senses. 16. Create a sense of height through planting Image credit: Future PLC/Tim Young A clever and simple idea for planting a small garden is to play with the heights to add a feeling of space and depth. Use clusters of different pots that contain foliage at varying heights and scales to make the most of the space. An ideal solution for small patios, courtyards and balcony gardens. 17. Add new levels Image credit: Future PLC/David Giles Add interest with small garden ideas by adding perspective with different levels. A classic way to do this is to have a raised or sunken terrace, and the lawn at another height. The ledges and steps will help open up how you can use the space, adding in extra spots for plant pots to be arranged or areas to add furniture to accommodate guests. You can also cheat this look with the clever use of raised beds. 18. Give fences double duty Image credit: Future PLC/Joanna Henderson Take inspiration from the elements of a living wall, by using vertical wall space for thoughtful planting. This allows even the smallest of garden spaces to flourish, making the most of the space, and is particularly useful if you are looking for decorative grassless garden ideas. The simple yet savvy addition of horizontal fence panels can turn the side of the shed into a decorative living wall. This could also work on a stretch of bare fence or wall when planning your front garden ideas, or on the side of a balcony. Any of these small outdoor spaces can be transformed into a vertical garden, accommodating smaller plant pots and baskets. 19. Zone with different flooring Image credit: Future PLC/David Giles Look down for some new small garden ideas. Choosing different mediums for the flooring across zones suggests changes in space without having to physically divide the space with borders or planting. 20. Camouflage your walls Image credit: Future PLC/Lizzie Orme In a small garden it’s beneficial to camouflage the walls as much as possible. Painting any exposed walls in a green exterior paint helps to blend in and further the sense of the surrounding greenery. Add a decorative garden mirror on top to bounce around images of surrounding foliage to add to the illusion. 21. Get creative with shelves and hooks Image credit: Future PLC/Jamie Mason Shelves and hooks aren’t just for indoors. Create extra precious surface area for pots and pretty accessories by putting up some shelves. Ideally they should be mounted into brick, as your garden fence might not be able to take the weight. Reclaimed scaffolding boards are an inexpensive solution, supported by wrought iron brackets that you can pick up for a few pounds from your nearest DIY store. The wall-mounted shelves will clear up your floor space from lanterns and plant pots. A recycled peg rail can also become the perfect place to hang outdoor lighting. 22. Go halves Photo credit: Dunelm Don’t let limited space stop you from enjoying alfresco dining. Invest in a compact dining solution like half-sized tables or bistro sets. The small dining set can then sit neatly against a wall, serving the purpose without encroaching on the limited space. 23. Zone your layout with an outdoor rug Photo credit: The Rug Seller Put down a decorative outdoor rug to direct the eye. It’s one of the easiest small garden ideas to achieve, and works by drawing the gaze to one defined area. The space around it won’t be as obvious upon first look, giving the illusion of more space. 24. Use paint to trick the eye Photo credit: Cuprinol Draw the eye up with a cleverly painted backdrop, creating the illusion of extra height and space. A simple two-tone block colour treatment can jazz up any expanse of garden fencing. Using a dark colour helps to make more of a statement with the effect, it also compliments green foliage beautifully. 25. Have extra seating to hand Photo credit: Argos Grab extra seats for when needed. Invest in a few oversized floor cushions for when you have guests over. Floor cushions are less imposing than alternative garden seating solutions. Plus they are easy to pile one on top of the other when not in use, ideal for easy storage. Pattered or brightly coloured cushions will also help to inject personality into the space. 26. Make the most of space with a multifunctional shed Image credit: Future PLC/Joanna Henderson Make a shed work harder in your small space by making it multifunctional. Use the shed to house garden furniture in the winter, then open out into a bar for garden parties and alfresco sundowners in the summer months. Cheers to that idea! 27. Elevate plants to new levels Image credit: Future PLC/Colin Poole Make the most of your small space by taking things to different levels with vertical shelving. This planting solution creates extra space to showcase potted plants and garden accessories. No matter how small your space, you can guarantee you’ll be using it as efficiently as possible. 28. Use every corner of a courtyard Image credit: Future PLC/Colin Poole If your small garden space is a courtyard think about how you can use every inch of space to full potential. Often a courtyard area has the potential to feel very enclosed, simply by the nature of looming brick walls surrounding it. Using clever corner seating will not only use the space most effectively, the high-back sofa design can help to hide a large portion of said imposing walls. This in turn will distract from the walls and create the illusion of space. 29. Squeeze in a mini greenhouse Image credit: Ikea Even the most modest outdoor space can include greenhouse ideas for growing plants. You can find half sized greenhouses, mini versions, as well as low-level options which can run along the wall of your home or garden fence. 30. Fix planters under the kitchen window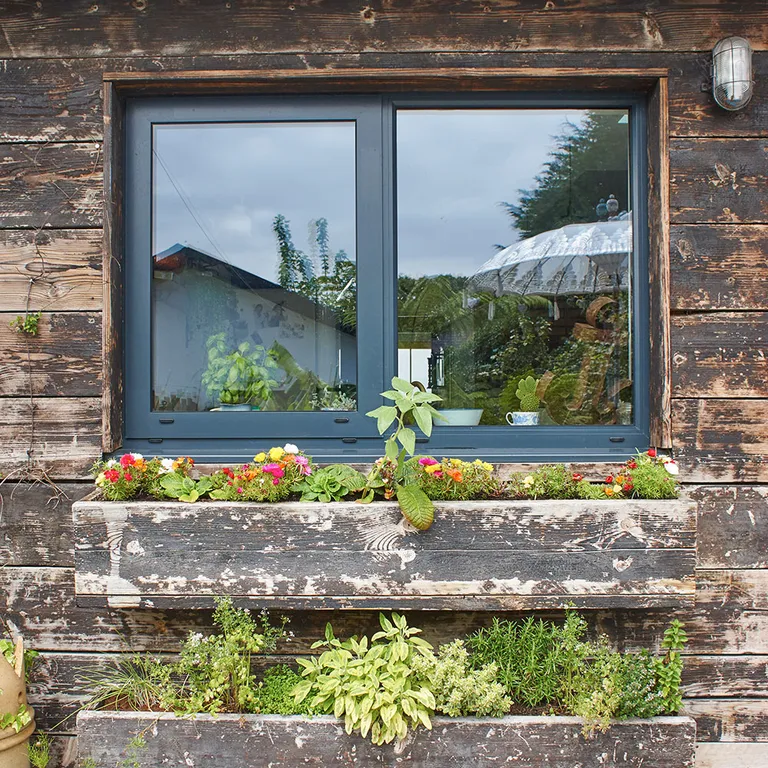 Image credit: Future PLC/Joanna Henderson Window boxes are a classic way to add planting to small spaces, but go one stage further by doubling up. Simply buy or build two simple troughs on top of one another. It’s a great place to grow herbs, especially if placed underneath a kitchen window. Just open the glass and reach out to grab what you need. 31. Introduce low walls that double as seating Image credit: Amy Cutmore You might only have room for a chair or two, so what happens when friends come over? By adding raised beds surrounded by walls, not only will your plants be easier to look after, you’ll also create extra places for people to perch. Add some cushions for comfort in complementary colours to your plants. 32. Paint walls white Image credit: Future PLC/Nick Pope White paint is often used to make the most of a small space because of its brightening and lightening properties, and small garden ideas can benefit from this trick, too. With white painted brickwork and white garden furniture, you can create a beautifully summery scheme that has serious style. 33. Plant a garden in pots to surround the seating Image credit: Future PLC/Keith Henderson You don’t need a lawn to create a lush garden – and flower beds aren’t necessary either. A low-maintenance ‘flooring’ option such as gravel is great for small gardens. Add lots of pots, filled with everything from the tiniest flowering plants to tall and bushy trees. Finish off with some garden furniture and you’ll have the perfect spot to enjoy a summer’s day. 34. Trail plants up a fence Image credit: Future PLC/Jamie Mason Make use of a fence to add colour and greenery. Climbing plants and trellises are a great solution for small gardens, as they lift flowers and foliage up off the ground. A pretty fence will do a lot to detract attention from a teeny plot – after all, if you or your visitors are focusing on beautiful roses or a hot-pink trellis, who’s going to notice a garden’s dimensions? 35. Brighten with colourful furniture Image credit: Future PLC/David Giles Even the tiniest terrace can be transformed into something exceptional. If your garden is short on square footage, a planted terrace can be a good solution, combining elegance with low maintenance. Simple paving such as travertine or traditional stone creates a sleek or rustic look, while clever planting will soften and provide privacy. Just add comfortable seating to create an ideal outside room. Plus, if your WiFi should reaches to your terrace, you’ve got a ready made summer WFH spot. 36. Plan a multitasking garden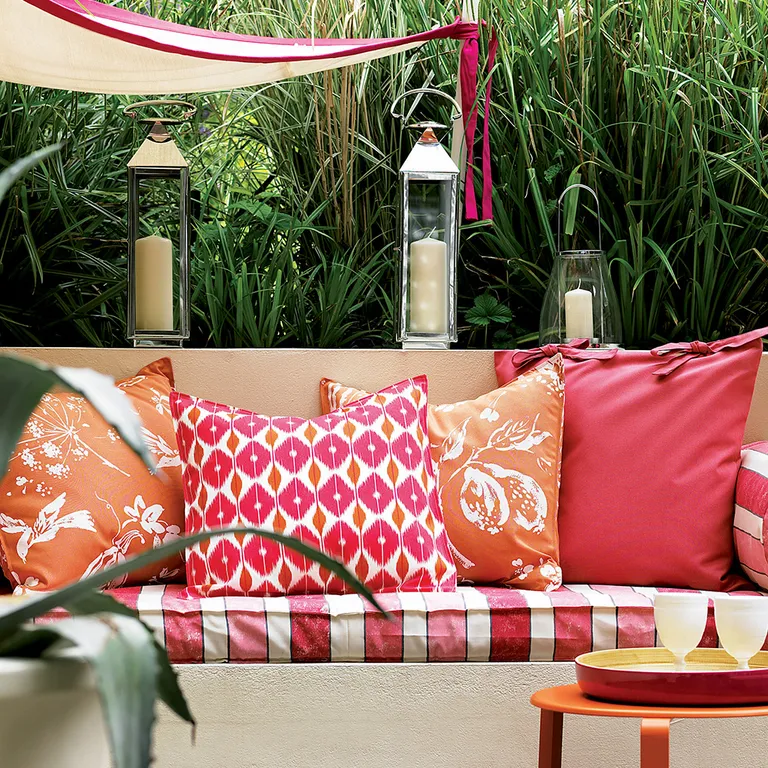 Image credit: Future PLC/Polly Wreford If space is tight, make sure that what you have is working hard for you. A well-planned garden could have a raised flower bed, garden wall and garden seat all rolled into one. Think about including greenery to provide shade, privacy and interest up high, while the wall would offer a handy ledge for lanterns, plus practical built-in seating. Cushions bring the comfort of indoor living outside and add a lovely hit of colour. 37. Mix your media Image credit: Future PLC/Annaick Guitteny Make a small space attractive and ensure a crisp contemporary look with strong landscaped lines. Create interesting interlocking zones with distinctive materials, such as woodstained decking ideas, pale patio slabs and decorative stones or chippings. Finally, plant up to let lush foliage burst through, filling the space with structural greenery for a controlled finish that's easy to maintain. 38. Focus on furniture Image credit: Future PLC/Annaick Guitteny Place objects of interest at the end of your garden and create the illusion that your space is bigger than it is. Choose white garden furniture and position it towards the back of a paved area. Play hide and seek by strategically planting large shrubs to partially obstruct the view; your mind will think there is more beyond to see. Add interest with plants at all heights and in all areas – with climbers and ramblers, evergreen shrubs, sculptural grasses and ground cover, all enlivened by colour-heavy cottage-garden favourites such as foxglove and delphinium. 39. Aim high Image credit: Future PLC/James Merrell Turn a small courtyard into a lush habitat with a tactile and towering living wall. Plant up a natural focal point for a super contemporary way to add interest while keeping much-needed floor space clear for patio slabs and super-sociable seating. Balance the domineering wall with a trio of large pots with small fruit trees and bedding plants. Living, or green, walls, once the domain of designer installations and pioneering commercial sites, are increasingly making their way into residential gardens. When it comes to how to make a living plant wall, foliage is rooted into a structure that is attached to a wall. A range of herbaceous perennials, grasses, small shrubs, herbs and even fruit and vegetables can be used to create these vertical small garden ideas. Try including scented plants, seasonal flowers and bulbs, but talk to your local garden nursery about plants that will suit the aspect and microclimate of the wall on which they will be grown. 40. Make room for little ones Image credit: Future PLC/Annaick Guitteny Come up with an ingenious small space that will appeal to both the design conscious and the fun conscious. Build a playhouse that blends seamlessly with the garden perimeter – here, contemporary linear fencing. Finish off the camouflage effect with a sedum roof so the little house blends perfectly into its environment. Store brightly coloured furniture inside this elevated version of garden shed ideas so it’s easy to take out for play time and return again when not in use. 41. Build a cool cabana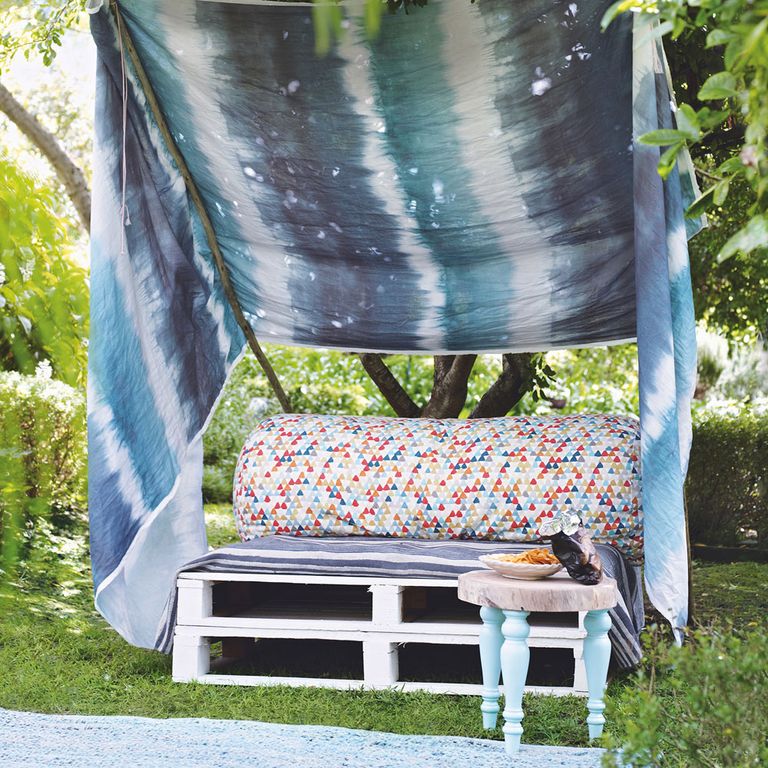 Image credit: Future PLC/Chris Everard Include garden shade ideas in your small garden with a homemade sun lounger – a few square feet, budget materials and your imagination are all you need. It’s a fine summer garden idea you’ll thank us for when the heatwave finally hits. Take two branches, two pallets, and a fabric offcut and assemble them to create a bohemian lounger for two. Make it comfortable and inviting with a bolster in funky geometric fabric. If your garden is dominated by the overhang of a tree, angle the fabric so that it can also act as a canopy, protecting the area below. 42. Choose easily stored seating Image credit: Future PLC/Simon Bevan Choosing outdoor furniture that folds or stacks when not in use is a great way to save on precious space in a small garden. Mix and match your colours for a bright looking garden scheme. 43. Opt for a neutral scheme Image credit: Future PLC/Robert Sanderson Just like indoors, opting for neutral walls and flooring can make a small garden feel lighter and brighter. Even if you have a small plot with not much natural greenery, you can create the look of a colourful garden with flower-filled pots and planters. Plus, you can swap these in and out to create different looks for different events. 44. Carve out extra space Image credit: Future PLC/Darren Chung When considering small garden ideas, one of the most important things is to work out how to make the most of every inch of available space. If you’re working with two levels, see if you can carve out an overhang and create a shaded area. A lovely place to curl up with a book, or stay cosy in the evenings with a firepit without taking up any lawn square footage. 45. Pretty up with soft furnishings Image credit: Future PLC/Simon Bevan Small garden ideas require careful planning if you’re going to make to most of a cosy corner. A garden bench is a practical and stylish way to make an impact – if you don’t mind relinquishing some precious floor space – and will be perfect for lounging should the sun make an appearance this summer! Choose a streamlined modern design and give it a colourful makeover with exotic cushions. How do you make a small garden look pretty?Living green walls are ultra-fashionable and can be used to hide unsightly boundaries and add lush foliage even in a garden where space is limited. A funky fireplace makes for a quirky focal point in the garden and allows you to enjoy summer evenings even longer (or even gives you a place to store your wood). Ask your garden designer to incorporate a built-in fireplace into their plan, or head to Amazon for a good selection of freestanding fire pits, from £30. Bright colours will also make a small garden really sing. Naturally, you can do this with planting, but there are other ways – such choosing a brightly coloured bistro set, or even by painting your fences or shed in a vivid pink or blue. How do you lay out a small garden?If your want to change your small garden layout, start by looking at the existing space. 'Look at what plants are thriving and think about where the sun falls,' advises Katrina Wells of Earth Designs. ‘If you like having the gang round for dinner, for example, you'll probably want to position your dining table and chairs where it's sunny. If it's a lunchtime gathering, you'll need some shade too. Also is there any dead space? Or a shed keeping your garden in the shade for half the day?’ Next, consider its upkeep. 'Think really carefully about how much time you are willing to dedicate to maintaining the space,' says London-based garden designer Charlotte Rowe. 'If you're time poor, more hard landscaping and sturdier plants will require much less attention than a lawn and beds with complex planting.' Paving and gravel courtyards are still popular, while concrete is right on trend. What are the best plants for small gardens? Image credit: Future PLC/Polly Eltes 'Start by working out the type of soil, the soil pH and the conditions in the garden, then buy the best plants for those surroundings,' says Sally Tierney of Yorkshire Garden Designer. ‘Include evergreens for year-round interest, use shrubs and trees for structure and height, and soft grasses and herbaceous perennials to add pops of colour and soften the architectural elements. ‘Plant a mix of bulbs that will flower in winter, spring and autumn in easy-to-arrange pots to add drama – they're also low-maintenance and look great in the high-traffic areas such as around the patio or a favourite bench.’ Climbing plants are great for small gardens – clematis are easy to grow, while honeysuckle and jasmine will fill your garden with fragrance. You could also plant fruit trees and fill raised beds with veg. Is there anything more rewarding than harvesting your own fresh crop of lettuce or strawberries? Potatoes, beans and onions are also fairly simple to grow successfully – and you don't need acres of space to cultivate them. It’s possible to grow enough to eat five a day from just 10 sq m of raised beds. How much does it cost to landscape a small garden?You can plan your own garden, but a trained designer will help you not only with your plant selection, but also know how best to maximise your space. Some will also do the landscaping (or work in tandem with a landscaper) to complete the job. Garden landscaping costs depend on the size of your garden, the complexity of the design and how much experience the designer has. An initial consultation might cost £450. A typical urban garden can cost anything from £6,000, including the design and build. The post 45 small garden ideas to make the most of your outdoor space appeared first on Ideal Home. |
| Energy price cap increase announced: what does this mean for your energy bills? Posted: 03 Feb 2022 03:55 AM PST The new energy price cap has been announced by Ofgem – the figure increasing from £1,277 (for those on a default tariff paying by direct debit) to £1,971, a whopping 54% rise. Prepayment customers will see an increase of £708 to £2,017. Effective from April this year, it's estimated that 22 million households will be affected. According to experts, a further rise is predicted for October 2022. Dr Craig Lowrey, Senior Consultant at Cornwall Insight said:"Our prevailing forecast of the Winter '22-23 indicates a further increase to more than £2300 per year, but we note that there are a number of legislative and regulatory proposals in development which could affect both this figure and that for Summer '22." The increase is a response to the current energy crisis, caused in large part by increased demand and lower supply, which has also seen over 25 UK energy firms go bust since August 2021. Jonathan Brearley, chief executive of Ofgem, said: "We know this rise will be extremely worrying for many people, especially those who are struggling to make ends meet, and Ofgem will ensure energy companies support their customers in any way they can. "The energy market has faced a huge challenge due to the unprecedented increase in global gas prices, a once in a 30-year event, and Ofgem's role as energy regulator is to ensure that, under the price cap, energy companies can only charge a fair price based on the true cost of supplying electricity and gas. "Ofgem is working to stabilise the market and over the longer term to diversify our sources of energy which will help protect customers from similar price shocks in the future." What is the energy price cap?
The price cap, introduced in January 2019, was meant to protect customers from big bill hikes. The cap sets a limit on how much domestic consumers can be charged per kWh of gas and electricity on standard variable and default tariffs, and those using pre-payment meters. It also sets a maximum daily standing charge, which is how much you pay for power to be supplied to your home. Those on a standard variable tariff (SVT), where the price per unit of energy can change each month depending on the wholesale price of energy (which has skyrocketed amid the energy crisis), will be feeling the pinch of those increased market prices. The cap does not affect those on fixed rate tariffs. Customers who have chosen a standard variable green energy tariff that Ofgem has exempted from the cap, or business users. In the past, hundreds of pounds could be saved by shopping around for the best energy deal, but spiralling costs means there are no good fixed-rate deals to be found right now. How does the price cap work?The cap can rise or fall, depending on the movements in the wholesale energy market. When prices go up, suppliers are able to reflect that – up to a certain point – in their customers' bills, but it also forces them to pass on any savings they make when prices fall. The energy regulator Ofgem reviews the price cap twice a year, in summer and winter, with any changes coming into effect in either April or October. The decision is announced publicly two months before. Ofgem gives the price cap as a yearly amount for a typical household. However it is important to note that is not a maximum amount that you will pay for your energy bill – that depends on how much you use. If you have a large drafty home and a big family, you will pay more than the current figure. What should I do if my fixed rate deal is coming to an end? Image credit: Jeremy Baile In the past, the best advice to save money on your energy bills was to shop around using a comparison site to find another cheap fixed rate deal. However, these deals have disappeared from the market and currently the cheapest you will find is around 56% more than the energy price cap. According to MoneySavingExpert.com, the cheapest fix on the market is around £1,730 a year for typical usage. That’s more than double the figure from November 2020 of just £830 a year. For most people, the best advice is to do nothing. Your provider will roll you on to their standard variable tariff, which means you will be protected by the price cap. Unlike a fixed rate tariff, you are not locked into a contract with a SVT, so should prices fall, you can move. While you can't switch, reducing how much energy you use will help to keep your bills as low as possible. The post Energy price cap increase announced: what does this mean for your energy bills? appeared first on Ideal Home. |
| Loft insulation grants – what is available? Posted: 03 Feb 2022 01:00 AM PST Insulating your loft, attic or flat roof is an effective way to reduce heat loss and reduce your heating bills. If the cost is prohibitive for you, there are loft insulation grants and freebies available. These are for households that qualify, to help cover the outlay. Around £3m measures were delivered through The Energy Company Obligations (ECO) grant by the end of December 2020. Energy Savings Trust states that when installed correctly, loft insulation should pay for itself many times over in its 40-year lifetime. Unfortunately for some, the cost of insulating your home can prove too expensive, which is why the government created loft insulation grants to help those in need. 'They're aimed at those who need them most, such as those on low incomes or people who are receiving benefits such as Pension or Universal Credit,' says property and construction expert Thomas Goodman at MyJobQuote.co.uk. With ever increasing energy bills, now is a good time to look for ways to reduce your home's energy consumption. One of the easiest and most cost-effective solutions is to install loft insulation. According to Energy Saving Trust, installing 270mm loft insulation will cost around £395 for a detached house. However the benefits far outweigh the initial outlay, with a potential yearly saving of £380 off your energy bill. What loft insulation grants are available in the UK? Image credit: Future PLC Read on to find out what loft insulation grants are on offer and if you're eligible. 1. The Energy Company Obligations (ECO scheme)This was put in place by the government to help reduce England's carbon emissions and tackle fuel poverty. It's funded by individual energy suppliers who, if they have more than 150,000 customers, are required by the government to promote the installation of measures that lead to financial savings on energy bills. This includes the installation of insulation and/or a boiler replacement. Bear in mind that the number and type of measures each supplier will install is down to each individual supplier. To find out which energy companies are currently part of the scheme, visit the Ofgem website. It's likely that you will qualify for the grant if you own your own home (or have permission from your landlord) AND you currently claim the Warm Home Discount and are in the 'core group'. You also qualify if you or someone living at the property receives benefits such as child benefit, universal credit or pension credit. For a full list of qualifying benefits visit Ofgem. Alternatively, if you are living in social housing with an EPC rating of E, F or G, you may also be eligible for the scheme.
2. The NEST scheme Image credit: Velux The Welsh government provides free advice and support to help people improve the energy efficiency of their home, which can include a package of free home improvements such as a replacing a boiler, central heating or insulation. You could be eligible for free energy efficiency improvements if you meet all three conditions below:
3. Warmer Homes Scotland scheme Image credit: Future PLC/William Goddard Much like England's ECO grant, this is designed to help people make their homes warmer and more comfortable by installing a range of energy-saving improvements that save money on your utility bills. In most cases all costs will be met by the Scottish Government, although sometimes a customer contribution is required.
Are there any specialist loft insulation grants for pensioners?The ECO, Nest and Warmer Homes Scotland schemes all offer insulation grants to those who receive a pension credit. But you still need to check with your energy supplier for the ECO, and Nest and Warmer Homes Scotland direct, as each will have its own set of criteria you have to meet. The post Loft insulation grants – what is available? appeared first on Ideal Home. |

| You are subscribed to email updates from Ideal Home. To stop receiving these emails, you may unsubscribe now. | Email delivery powered by Google |
| Google, 1600 Amphitheatre Parkway, Mountain View, CA 94043, United States | |


No comments:
Post a Comment