Made with a luscious feta cheese sauce, LOADED with Mediterranean vegetables, and topped with a ridiculously tasty pita chip topping, it’s a fresh twist on everyone’s favorite cheesy pasta casserole.
I can't say with any shred of historical accuracy that Greek mac and cheese is how Aphrodite seduced every god on Olympus, but I think it's a reasonable theory. (I would also venture a guess that this Greek Layer Dip was also in her arsenal.)
It transforms classic ingredients in Greek salad, like bell peppers, tomatoes, Kalamata olives, and feta cheese, into a glorious pan of bubbly, cheesy noodles that’s one of our favorite things we’ve eaten in a long time.
Finished with a crispy, crunchy pita chip and herb topping, this baked Greek mac and cheese is an Athens-approved party in a pan.
“I made this for my boyfriend tonight. And it was delicious!”
— Shohreh —
How to Make Greek Mac and Cheese
Featuring a creamy, yet lighter, feta cheese sauce, tender peppers, sun-dried tomatoes, salty Kalamata olives, and a crunchy pita chip topping, this cozy Greek mac and cheese recipe will transport you straight to the Acropolis of Athens.
Tip!
If you love all-things mac and cheese, then you don’t want to miss my recipe for Ultimate Creamy Mac and Cheese, 4 Ways in The Well Plated Cookbook.
The Ingredients
Pasta. A whole wheat short-cut pasta, like elbow macaroni, penne, or rigatoni, is ideal for this baked Greek mac and cheese (and this Chicken Alfredo Bake). Their tubular shape makes the perfect vessel for all that rich cheesy feta sauce.
Tip!
Be sure to cook the pasta only until it is just below al dente, since it will cook further in the oven.
Bell Peppers. Pack in the vitamin C (up to 169% of the RDI in a single pepper) along with other key nutrients, such as vitamin A, vitamin B6, vitamin E, folate, and potassium, they are colorful, nutritious, and make this mac an all-in-one dinner.
Market Swap
A jar of drained roasted red peppers would make a tasty swap for fresh bell peppers if you don’t have any on hand.
Sun Dried Tomatoes. Infuse this Greek-style mac and cheese with a rich and robust tomato flavor (I also love sun dried tomatoes in this Sun Dried Tomato Pasta).
Kalamata Olives. Aside from being quintessentially Greek, Kalamata olives are also packed with heart-healthy monounsaturated fats and antioxidants.
Spinach. Loads up every serving with a daily dose of iron, calcium, folic acid, and vitamins A, C, and K. (It’s also how I sneak some extra nutrition into this Spinach Artichoke Mac and Cheese.)
Market Swap
I reached for a package of frozen spinach since I like to keep it on hand in my freezer. However, you can swap the spinach for chopped fresh spinach. Simply allow the greens to wilt once mixed into the warm sauce and pasta before transferring to a casserole dish to bake.
To use a heartier green, such as kale, saute it before adding it to the sauce.
Onion + Garlic. Aromatic essentials.
White Cheddar + Feta. White cheddar offers sharpness and a gooey melty texture while feta brings it zippy tang and iconic Greek flavor (if you love feta, you’ll also enjoy this Feta Dip).
Cottage Cheese. I kept this macaroni and cheese lean and mean with a secret ingredient: low-fat cottage cheese. Don't freak out. The cottage cheese melts beautifully and gives the sauce richness and body, without the excess of heavy cream (I use it in Low Carb Lasagna too).
Substitution Tip
If you’re not a fan of cottage cheese, swap part-skim ricotta cheese.
Nonfat Milk. No heavy cream or full-fat milk required (save it for this Adult Mac and Cheese). This skinny Greek mac and cheese cuts fats and calories by opting for skim milk over its full-fat counterparts.
All Purpose Flour. Our thickening agent that makes our simple sauce ultra-rich and creamy.
Red Wine Vinegar. Adds a little acidity to balance out the sweetness of peppers and the bite of the onion and garlic.
Parsley + Oregano. Offer color and some fresh Mediterranean flair.
Pita Chips. To keep things Greek, I swapped out traditional breadcrumbs (like on this Pumpkin Mac and Cheese) for crushed pita chips. They’re the perfect extra crunchy and toasty topping to contrast the creamy-dreamy feta cheese sauce.
The Directions
Sauté the onions and peppers.
Make the pita chip topping. Drain the spinach and rehydrate the sun-dried tomatoes.
In a small bowl, whisk together the some milk and the flour.
Make the feta cheese sauce.
Cook the pasta until not quite tender. Drain, then combine with the sauce and veggies.
Transfer the mixture into a baking dish, top with crushed pita chips, and bake until bubbly and golden. Garnish with chopped parsley and serve. ENJOY!
Storage Tips
To Store. Greek mac and cheese, once baked, may be refrigerated for up to 3 days.
To Freeze. Once baked, Greek mac and cheese may be frozen, well-wrapped, for up to two months. Defrost overnight in the fridge before warming.
To Reheat. Warm in a 350 degree F oven, covered with foil, until heated through.
Meal Prep Tip
Greek mac and cheese can be prepared through Step 6, then covered and refrigerated for up to 2 days or frozen for up to 3 months. To bake, thaw in the refrigerator, if necessary, then proceed with the recipe as directed, baking for 35 to 45 minutes.
Saucepan. This everyday saucepan is my favorite for making stovetop sauces, like the feta cheese sauce for this Greek mac and cheese recipe.
Skillet. An essential item no kitchen should be without.
Casserole Dish. This collection of colorful ceramic baking dishes comes in different sizes and an array of colors.
My Favorite Casserole Dish
Pick your favorite color! Made from durable porcelain for dishwashers, ovens, refrigerators and microwaves, these set of different sizes is easy to clean too.
Sorry, Hercules, there’s a new demigod, and its name is Greek mac and cheese.
Frequently Asked Questions
Is Greek Mac and Cheese Gluten Free?
No. If you would like to make this Greek mac and cheese gluten free, it would be an experiment since I have not attempted it myself. I would start by swapping the pasta for your favorite gluten free variety and substituting the all-purpose flour for cornstarch as an alternative thickening agent.
Can I Make Greek Mac and Cheese with Artichokes?
Sure! If there are other Greek flavors you enjoy, feel free to experiment and add them or swap them for other ingredients in this recipe to suit your personal tastes.
Can I Swap Halloumi Cheese for Feta?
No. While I love Halloumi cheese (see this Grilled Halloumi Cheese) it is not ideal for this Greek mac and cheese recipe since it does not crumble well or melt when heated. For a different cheese option, try crumbled goat cheese.
1 1/2cupsextra-sharp white Cheddar cheeseshredded, about 6 ounces
1 1/2cupslow-fat cottage cheese
1/4teaspoonsalt
1/4teaspoonfreshly ground black pepper
1cupcrumbled feta cheeseabout 4 ounces
1/4cupsliced Kalamata oliveschopped
12ounceswhole-wheat elbow macaronior penne
1/4cupchopped fresh parsleyfor serving
Instructions
In a large sauté pan, heat 1 tablespoon olive oil over medium. Add the onions and cook until beginning to turn translucent, 5-8 minutes. Add red bell pepper, green bell pepper, and garlic and cook until the peppers are tender, about 8 additional minutes. Add red wine vinegar and cook 2 additional minutes. Set aside.
Bring a large pot of water on to boil. Place rack in center of the oven and preheat oven to 400°F. Coat a 3-quart baking dish with cooking spray. (A deep 9×9-inch pan will work as well.)
Mix breadcrumbs, remaining 1 tablespoon olive oil, and oregano in a small bowl. Place spinach in a fine-mesh strainer and press out excess moisture. Place sundried tomatoes in a small bowl and cover with boiling water (this will rehydrate the tomatoes). Set aside.
In a large, heavy saucepan, heat 1 3/4 cups milk over medium-high heat until steaming (do not boil). In a small bowl, whisk together the remaining 1/4 cup milk and flour until smooth.
Add to the hot milk and cook, whisking constantly, until the sauce simmers and thickens; about 3 to 5 minutes. Remove from heat and stir in the cheddar until melted. Stir in cottage cheese, salt, and pepper.
Cook pasta for 6 minutes, until not quite tender. (It will continue to cook during baking.) Drain pasta, then add to cheese sauce; mix well. Drain the sundried tomatoes, then fold them into the mixture, along with the sautéed onions and peppers, spinach, feta cheese, and olives. Spoon the mixture into the prepared baking dish, then top with crushed pita chips.
Bake the casserole until bubbly and golden, 25 to 30 minutes, checking at the 15-minute mark to ensure that the pita chips are not toasting too quickly (if they are, cover the pan with foil and continue baking). Garnish with chopped parsley and serve warm.
Notes
MAKE AHEAD: Greek mac and cheese can be prepared through Step 6, then covered and refrigerated for up to 2 days or frozen for up to 3 months. To bake, thaw in the refrigerator, if necessary, then proceed with the recipe as directed, baking for 35 to 45 minutes.
TO STORE: Greek mac and cheese, once baked, may be refrigerated for up to 3 days.
TO FREEZE: Once baked, Greek mac and cheese may be frozen, well-wrapped, for up to two months. Defrost overnight in the fridge before warming.
TO REHEAT: Warm in a 350 degree F oven, covered with foil, until heated through.
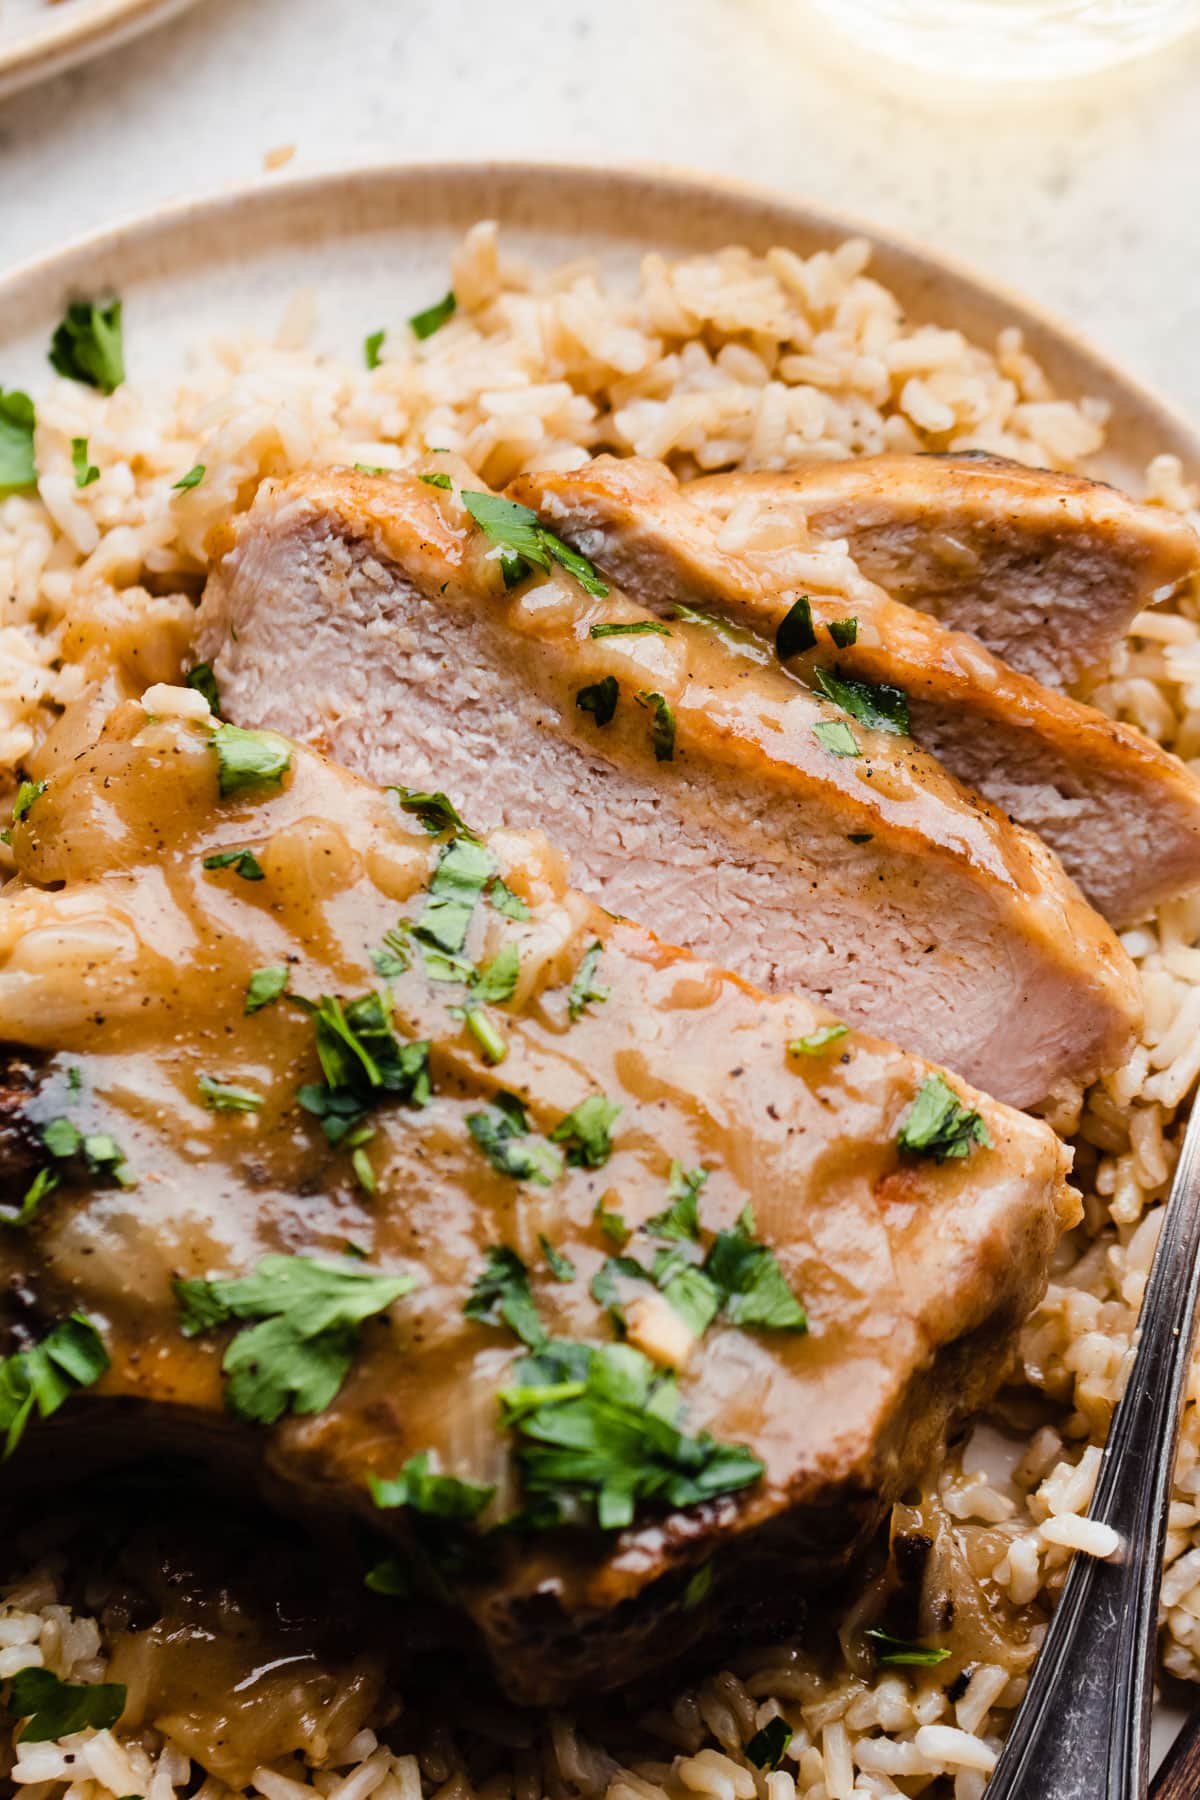
Thick-cut pork chops that are mouth-wateringly tender (YES, there is such a thing as pork chops that are NOT dry) and bathed in a rich onion gravy, this pork chop recipe is easy to make and the kind of homey comfort that never fails to hit the spot.
I avoided pork chops for most of my adult life.
My childhood body of evidence taught that pork chops were bland, dry, and chewy.
As these creamy smothered pork chops declaratively prove, it does not have to be this way!
Secrets to Tender Pork Chops
To keep pork chops from drying out, you have to do two main things:
NOT overcook them
Choose the right cooking method.
I also recommend thick-cut, bone-in pork chops, as they are the most difficult to overcook.
These easy smothered pork chops use a few tactics to tenderize them.
They begin as pan fried smothered pork chops. The sear on the outside helps create a tasty brown crust.
Then, they bake at a moderate temperature (350 degrees F) in a rich stock mixture, which keeps them moist.
While the chops rest, the pan drippings are reduced into a phenomenal gravy that serves as an additional insurance policy (it’s harder for a smothered pork chop to taste dry).
For Extra Tender Pork Chops
If you’d like to go above and beyond to make the most tender, moist pork chops of your life, brine the pork chops (submerge in a saltwater solution) for 45 minutes or up to 12 hours prior to cooking.
Brining is not strictly necessary for good results (we’re still cooking the pork chops gently in liquid and smothering them with gravy), but it does provide another layer of protection against tough chops.
How to Make Smothered Pork Chops
It’s mood comfort food!
These smothered pork chops are intensely savory, well-seasoned, and will more than right the wrongs of dry pork chops past.
Tip!
This recipe yields a generous amount of the gravy; don't skip it! Everyone is going to want more, so spoon a generous portion onto each plate. You can use any leftovers to top Air Fryer Chicken Breast.
The Ingredients
Bone-In Pork Chops. Bone-in pork chops are extra flavorful and less prone to drying out than boneless. They’re also a wonderful source of lean protein.
Flour. A light coating of all-purpose flour and spices creates a scrumptious, crust-like exterior for the pork chops.
Spices. Cumin and smoked paprika add rich smoky and earthy flavors. Salt and pepper are can’t-miss classics.
Onions. The onions help build deep flavor for the gravy and pair nicely with the pork chops.
Dijon Mustard. The tangy bite of Dijon mustard adds depth to the gravy and is a lovely pairing with the pork and onions.
Chicken Stock. Richly-flavored chicken stock acts as a base for our gravy sauce. It also deglazes the pot after cooking the pork and onions, ensuring that we don’t miss any of those delightful browned bits.
Balsamic Vinegar. For depth of flavor and a hit of acidity.
The Directions
Brine the pork chops (if desired). Pat dry.
Stir the flour and spices together.
Dredge the pork.
Brown the pork chops on both sides, then transfer to a plate.
Saute the onions.
Add the stock and simmer until thickened. Return the pork to the pot.
Cover and bake the smothered pork chops at 350 degrees F for 30 to 40 minutes. Remove the pork to a plate. Finish making the gravy on the stove
Remove the pot from the heat, then add the pork chops back in. ENJOY!
How to Serve Smothered Pork Chops
Rice. Smothered pork chops with rice is our favorite! It soaks up the sauce nicely. Try them with brown rice, wild rice, or even this Lemon Rice.
Pasta. Serve your pork chops over a bed of whole wheat pasta or egg noodles.
To Store. Refrigerate pork chops and gravy in an airtight storage container for up to 3 days.
To Reheat. Gently rewarm leftovers in a baking dish in the oven at 350 degrees F or in the microwave.
To Freeze. Freeze pork chops in an airtight freezer-safe storage container for up to 3 months. Let thaw overnight in the refrigerator before reheating.
Leftover Ideas
Leftover Pork and Gravy. Use leftover pork chops to create a spin on a French dip sandwich. Place thin slices of your pork chops between two pieces of toasted bread (add cheese if you please), and serve the sandwich with a side of the gravy for dipping.
Leftover Gravy. Leftover gravy is scrumptious over a Baked Chicken Breast for lunch or dinner. For breakfast, serve it over a sturdy, thick piece of toast with an egg on top.
Cook this recipe to prove to yourself that pork chops can be moist.
Cook it because the gravy alone is a thing of beauty.
Cook it because you need a dinner that your family will love, and this recipe is going to be a hit!
Frequently Asked Questions
Why Are My Pork Chops Tough?
If your pork chops are tough, there is one sure-fire reason: you overcooked them. USE A THERMOMETER (this one is inexpensive and works well; this one is fast, dead accurate, and will last years). I really cannot stress this thermometer point enough.
Can I Make Spicy Smothered Pork Chops?
Yes, you can add a pinch of cayenne pepper to your spice mixture to give your pork chops a kick.
How Can I Prep My Pork Chops in Advance?
Up to 12 hours in advance, add the pork chops to the brining liquid (if using) and store them in the refrigerator. Mix the spices and flour together in a bowl, then cover and store it at room temperature.
Smothered Pork Chops Video
If you enjoy this video, please subscribe to our YouTube channel. Be sure to click the BELL icon so you can be the first to know when we post a new video (and thank you for subscribing!).
If you'd like to brine the pork chops, do so 45 minutes to 12 hours before you plan to start cooking (see recipe notes).
Pat the pork chops very dry on both sides with paper towels (discard the brine if using).
Place a rack in the center of your oven and preheat the oven to 350 degrees F. In a wide, shallow bowl (a pie dish works well), stir together the flour, cumin, paprika, 1/2 teaspoon salt, and 1/4 teaspoon pepper.
In a Dutch oven or similar large, deep, oven-safe pot with a tight-fitting lid, heat the oil over medium. Dredge the pork chops in the flour mixture on both sides, shaking off any excess. Reserve the remaining flour mixture.
Once the oil is hot and shimmering, gently lower the chops into the pan (lower them away from you to prevent splattering yourself with oil). Cook on both sides until brown and crisp, about 3 to 4 minutes per side (they will not be fully cooked through). If the pork chops will not all fit in your pan without touching, cook them in batches. Transfer to a plate.
Reduce the heat to medium-low. Add the onions, remaining 1/2 teaspoon salt, and remaining 1/4 teaspoon pepper. Cook, stirring often, until the onions are completely softened, about 15 minutes. Stir in the Dijon mustard.
Sprinkle 3 tablespoons of the reserved flour mixture over the top of the onions. Stir to combine and cook for 2 full minutes, stirring often. No white bits of flour should remain.
Slowly add 1 1/2 cups of the stock, stirring constantly. With a wooden spoon, scrape along the bottom of the pan to remove any brown bits. Let simmer until the sauce starts to form a cohesive mixture and is slightly thickened. Return the pork to the pot, nestling it in a single layer.
Cover the pot and place it in the oven. Bake the smothered pork chops until the pork is tender and reaches 135 to 140 degrees F on an instant read thermometer, about 30 to 40 minutes (pork is considered safe to eat at 145 degrees F, but its temperature will continue to rise as it rests).
Transfer the pork chops to a plate. Return the pot to the stovetop. Turn the heat to medium, add the remaining 2 1/2 cups stock, and reduce, stirring often and scraping along the bottom of the pan, until the sauce thickens into a gravy, about 15 minutes. Stir in the balsamic vinegar.
Remove from the heat. Return to the pork chops and any juices that have collected on the plate to the pan to let the gravy rewarm them. Serve hot, smothered with gravy, and sprinkled with chopped parsley or thyme.
Video
Notes
*BRINE: If time allows, for the juiciest possible pork chops, submerge them in 4 cups water mixed with 3 tablespoons kosher salt for 45 minutes at room temperature (or up to 12 hours in the refrigerator). Drain and pat dry. Reduce the salt in the dredging mixture to 1/4 teaspoon and the salt added to the onions to 1/4 teaspoon.
TO STORE: Refrigerate pork chops in an airtight storage container for up to 3 days.
TO REHEAT: Gently rewarm leftovers in a baking dish in the oven at 350 degrees F or in the microwave.
TO FREEZE: Freeze pork chops in an airtight, freezer-safe storage container for up to 3 months. Let thaw overnight in the refrigerator before reheating.


No comments:
Post a Comment